The Delivery module allows you to deliver tracks and associated metadata out of the system. This module can be used to deliver tracks to streaming platforms such as Spotify and Youtube and can also be used to deliver purchased tracks to your customers.
Please be aware that the Delivery module is an additional paid feature - if you would like more information on the Delivery module, please contact your Account Manager to discuss.
When setting up your Delivery, we recommend following the order below but feel free to jump to the section most relevant to you.
Packages
A Delivery Package is a Package in which your selected tracks are located in order to be delivered to your preferred destination, such as PROs, DSP, partners, distributors and overseas representatives.
Creating a Delivery Package:
Creating a Delivery Package is quite simple. You head into Admin and find the ‘Delivery’ tab down the right hand side column. Next, select Packages and press ‘+Create’ in the top right hand side corner. This will take you to the below page:
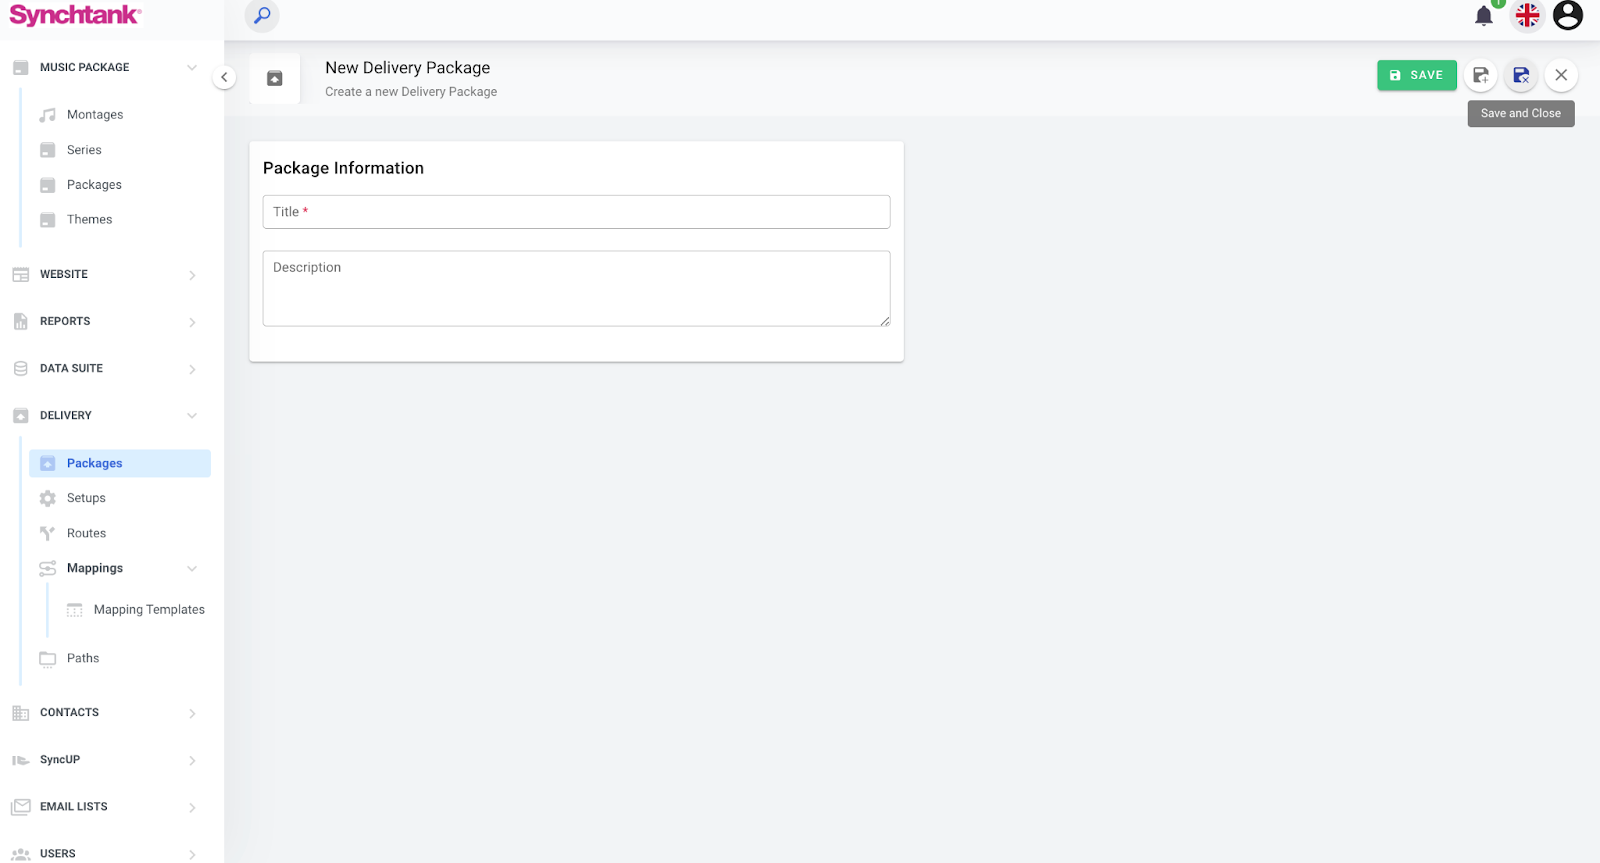
Here you can enter the name and description of the Delivery Package you want to create. Press Save and your Delivery Package has been created and can be managed on this page.
Add tracks to Delivery Package:
You can select tracks to be added to your Delivery Package multiple ways:
Masters
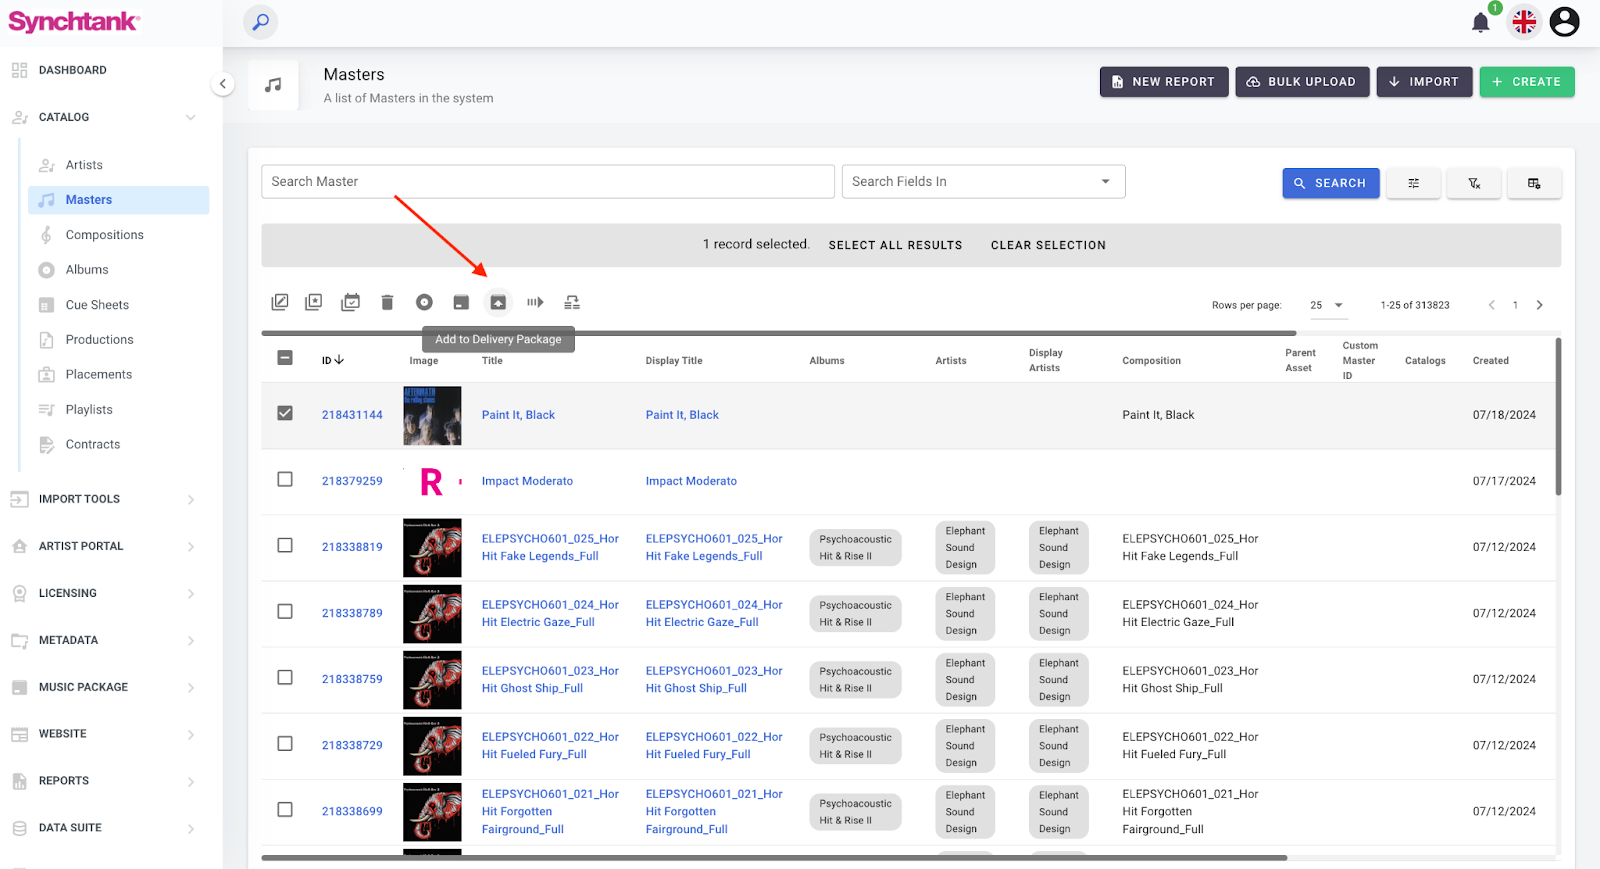
You can go to your Masters search page and type in the tracks you want to add to the Package. You are able to add them individually or select multiple and then click the ‘Add to Delivery Package’ button above the tracks.
Once this has been clicked a pop up like the below will appear:
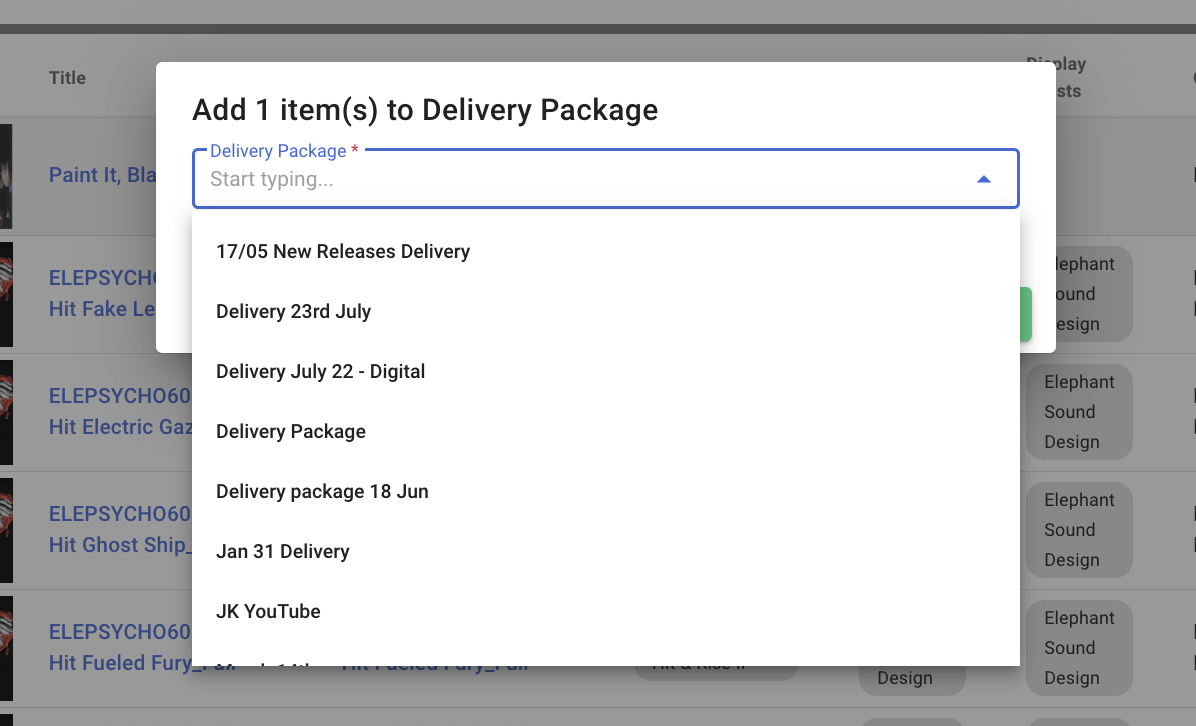
This is where you select the Delivery Package you want to add the track(s) to. Select the correct Delivery Package and click save. Your track will now appear in your selected Delivery Package.
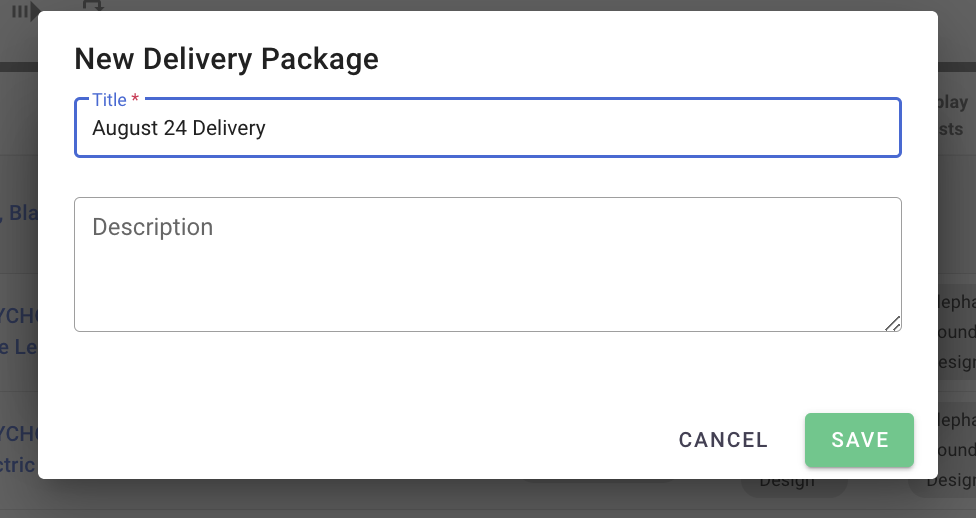
At this point if you haven't yet created a Delivery Package, you are able to do so by typing in the requested name and selecting ‘+ Create Delivery Package’ and save. This will then create a Delivery Package and add the selected track to that Delivery Package.

Albums
You can also add albums to a Delivery Package through the ‘Album’ page in admin, that can be found under ‘Catalog’ in the right hand side column.
- Find the Album(s) that you would like to add to the Delivery Package
- Press select on which album(s) you would like to add
- Click the ‘Add to Delivery Package icon above the albums
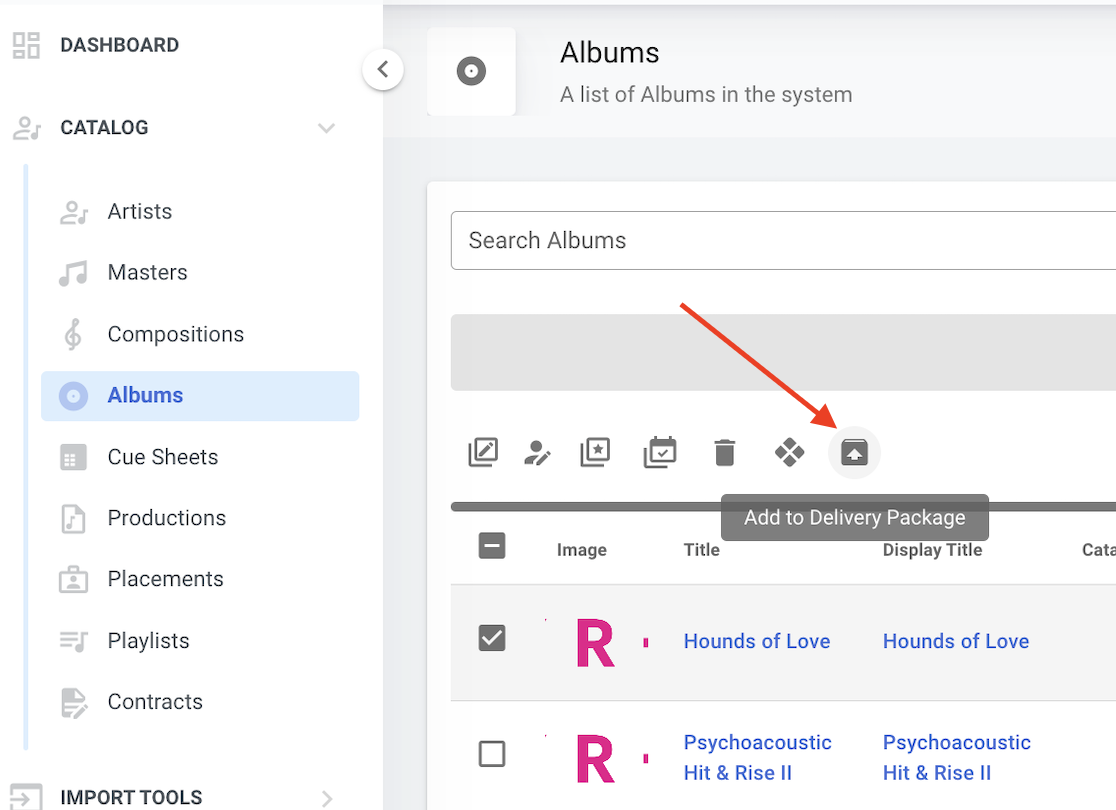
This will then add the full album and the tracks within the album to the selected Delivery Package.
Playlists
The final way to add tracks to a Delivery Package is through playlists. This can be done through the ‘Playlists’’ page in the Synchtank Admin, navigate to the ‘Catalog’ section in the right hand side column.
- Type in the Album that you would like to add to the Delivery Package
- Press select on which playlists you would like to add
- Click the ‘Add to Delivery Package icon above the playlists
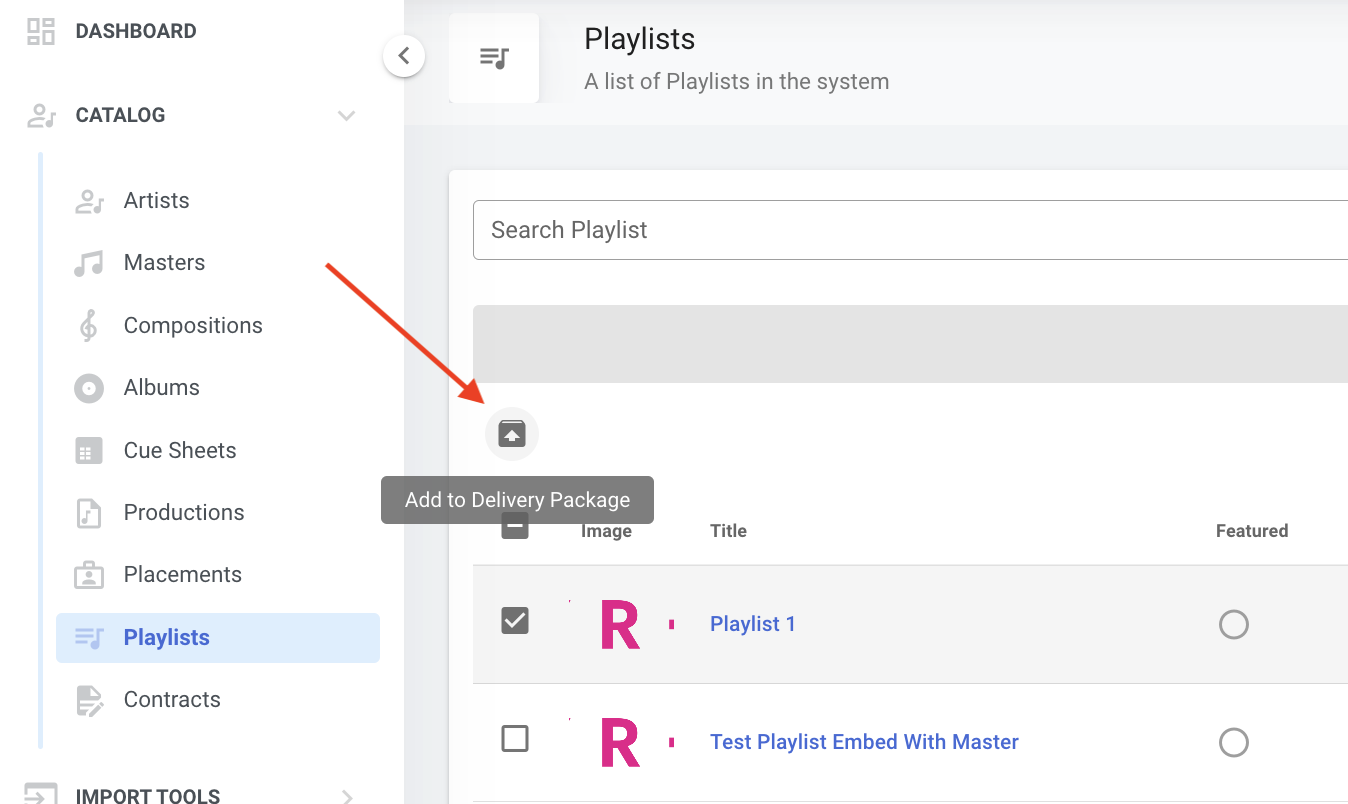
This will then add the selected playlists to the Delivery Package.
Routes
Routes are where you are able to set up the credentials of the end point of where they want to deliver to. Ie. DSP’s, Distributors etc. These only need to be set up once for each endpoint and can then be used for as many Deliveries to that endpoint as needed
You can do this by finding the ‘Routes’ Section under ‘Delivery’ in the right hand side column in admin. Then pressing ‘+Create’ in the top right hand corner.
- Enter the name of the Delivery ie. ‘Spotify Delivery June 2024’
- DDEX Deliveries only - Enter your DPID code that is relevant to your DDEX Delivery. More information can be found here: https://dpid.ddex.net/register
- Then select which end point you would like to deliver to under ‘Type’
Please note that the type usually depends on who you are delivering to as some endpoints will want the tracks to be delivered in a specific route. This would be down to the user to discuss the requested Delivery routes with the endpoints.
Depending on what ‘type’ you have selected, then different criteria will appear. Please see the below most commonly used formats (this is not all of them):
Amazon S3
If your endpoint customer would like you to deliver to an Amazon S3 bucket then you can select this format and the relevant credentials will appear.
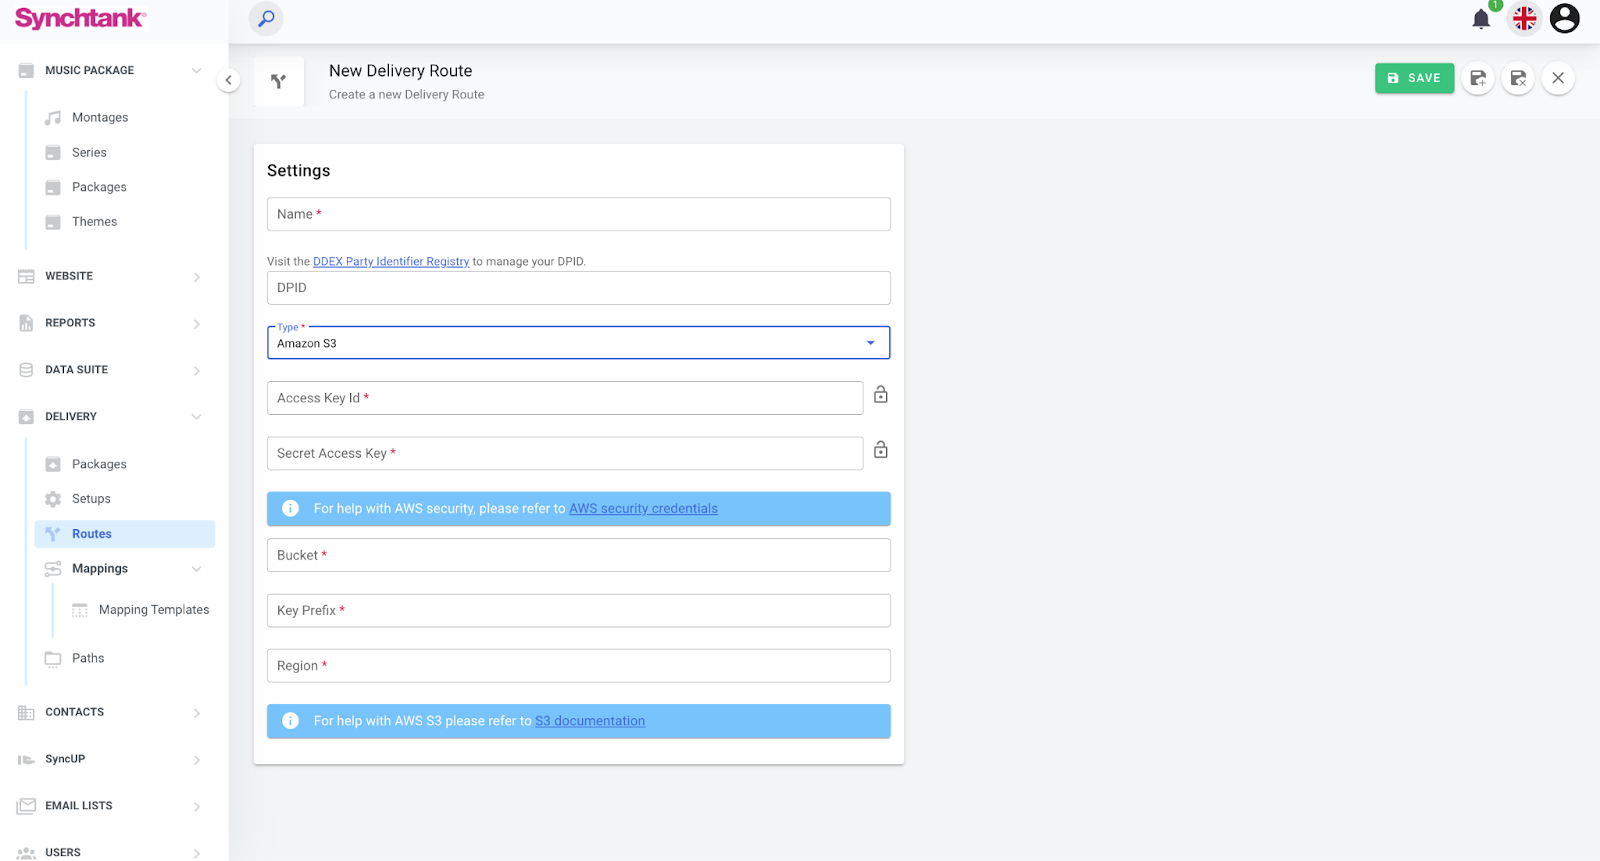
Any access keys should be provided by the endpoint - please request these details from them directly.
AWS also has various support pages on how to deliver to an Amazon S3 bucket which are included on this page. I have also included them here:
AWS Security credentials: https://docs.aws.amazon.com/IAM/latest/UserGuide/security-creds.html
S3 documentation: https://docs.aws.amazon.com/s3/
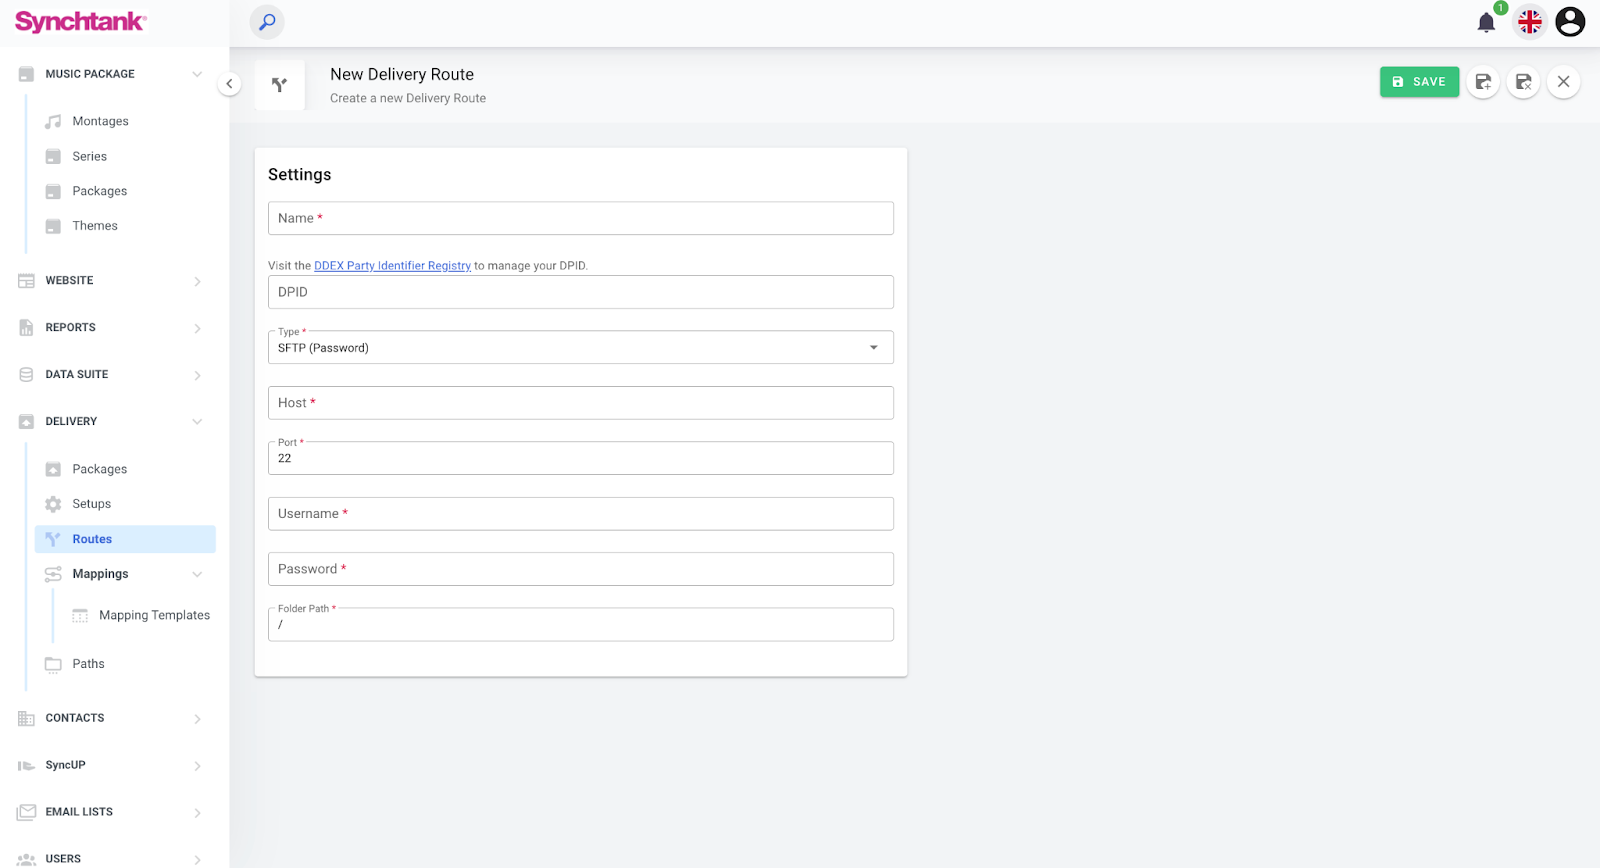
SFTP (Password)
If your endpoint customer would like you to deliver to an SFTP (password) bucket then you can select this format and the relevant credentials. Selecting SFTP (password) will require a password to access this SFTP.
Any access keys/passwords should be provided by the endpoint - Please request these details from them directly.
SFTP (Key)
If your endpoint customer would like you to deliver to an SFTP (Key) bucket then you can select this format and the relevant credentials. Selecting SFTP (Key) will require a Private key file to access this SFTP.
There is also a ‘Generate Private Key’ toggle which will generate a private key for the endpoint user to use to access the SFTP
Any access keys/passwords should be provided by the endpoint - Please request these details from them directly.

Dropbox
If your endpoint customer would like you to deliver to a Dropbox then you can select this format and the relevant credentials. Selecting Dropbox will require an Access token to access this Delivery route.
You will need to visit your Dropbox app/homepage to generate your access token.

These can then be saved and all of your Delivery routes will appear on the ‘Routes’ page under ‘Delivery’. These can also be edited on this page.
Mappings
Once you have set up what you want to deliver (Packages) and where you want to deliver it to (Routes), you will then need to customize the metadata format in which these Deliveries get sent (Mappings) to ensure the format conforms to whatever the endpoint is requesting.
The ‘mappings’ tab is a place which stores the customized metadata formats a user has created and that are saved in the system.
Delivery mappings can be searched and found on this page and when selected, all the details for the relevant Delivery mapping will appear.
You are able to edit each individual Delivery mapping by selecting the chosen mapping and clicking ‘edit’ in the top right hand side corner.

Creating/Editing a Delivery mapping
To create a new Delivery mapping, please follow the below steps:
- Click on the ‘+Create’ button in the top right hand side corner of the ‘Mappings’ page.
- Type the requested name in the ‘Name for this mapping’ box
- Select the relevant ‘Format’
We currently have the following mappings available and are continuously updating this list - please check back here for the latest updates!
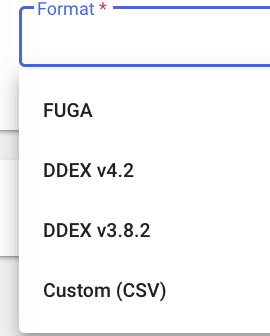
The Delivery Module comes with the standard DDEX 3.8.2 and DDEX 4.2 mappings, complete with Release Deals from your system included in the output, along with Fuga.
We also have the ability for custom CSV metadata mappings. This allows you to upload a custom CSV template and map Synchtank data fields to the template. This format can be delivered to any specified endpoint outside the system.
Custom CSV
This allows you to create your own metadata export format on the system and build your own custom CSV spreadsheets.
When selecting ‘Custom (CSV)’ there is an optional field to select a ‘Template File; which means you are able to pull a custom spreadsheet that has been previously stored in the ‘Mapping Templates’ page into your new mapping.
The mapping has a list of fields that, when selected, will automatically pull in the fields included in the spreadsheet into your mapping and populate the fields in the left hand side column.
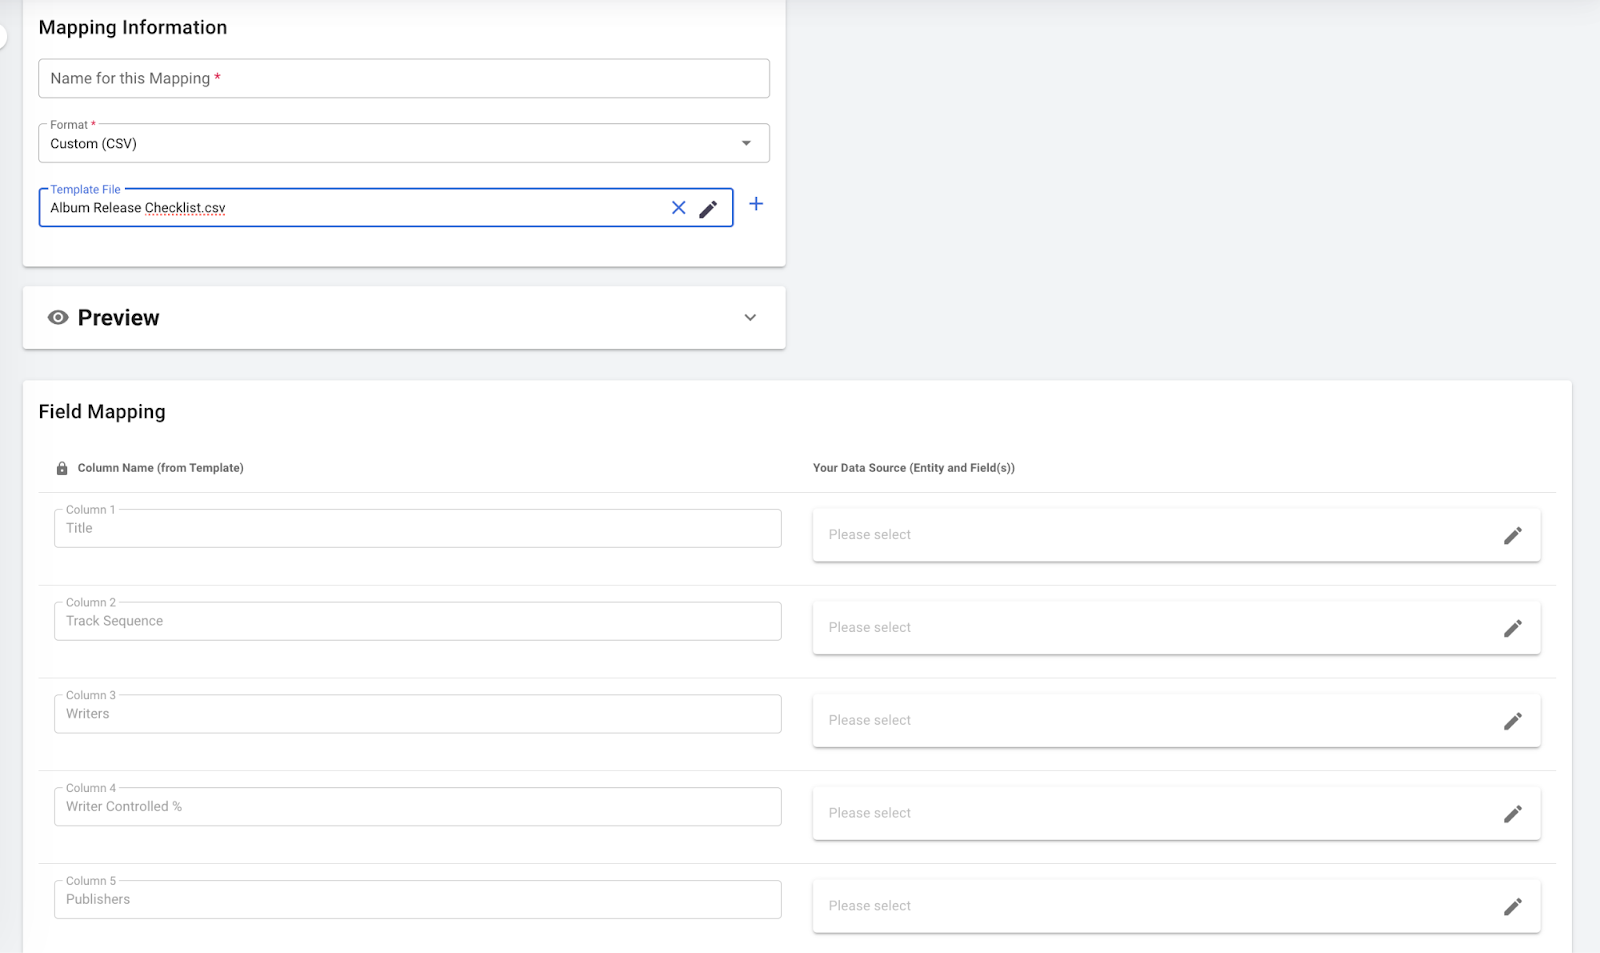
Preview
This allows you to select a master/album to pull in and see what data is getting generated for the master/album. This is to ensure that each field is correctly mapped as you had expected.
Field Mapping
You can transform your data entries as needed by joining them on the mapping page. More details to follow.
There is also functionality to add a static free text field to add to your Delivery mapping.
Mappings templates
The ‘mappings template’ tab stores the spreadsheet templates in which the endpoint has been sent to you. If your endpoint has a specific format they want the metadata to be delivered in, then they most likely will send you a spreadsheet with the format that can be uploaded to ‘mapping templates’ and will be stored on the system for you to use the template in the future.
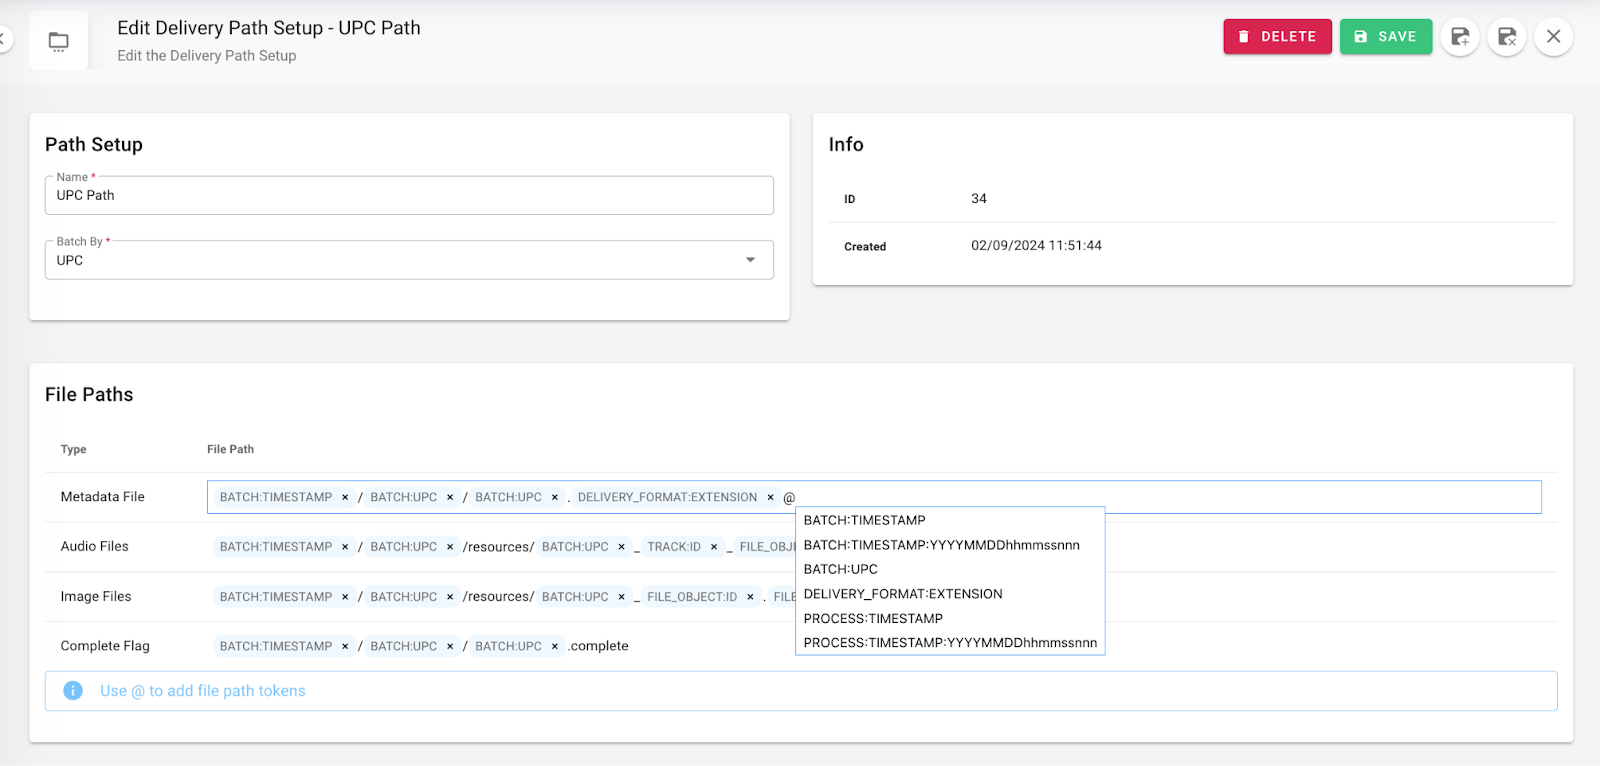
Paths
This is where you can control your formats of your Delivery title ie. your audio file and metadata file name.
You can create and edit your file names on this page and it will allow you to amend how you would like your file names to show when delivering.
You can add in your required field by adding in the @ sign and a list will pre populate with multiple option fields that can be pulled in when selected.
There is also functionality to add a static free text field to add to your Delivery title.
Setups
Once you have set up all of the separate items, you will need to then need to group these together in the form of a Setup in order to create a Delivery.
To do this, you will need to follow the below steps:
- Click ‘+Create’ in the top right hand side of the Setups page
- Select the relevant Package, Route and Data Format (If you are delivering a standard format you can skip setting up your Delivery mappings, as the standard fields are available here)
- Select the ‘Batch by’ section as either UPC or Packages (This is how the tracks are grouped together in your import)
- Select your Mapping and the Path set up
- Select the relevant audio file format that your endpoint requests in ie. Wav/ MP4 etc.
This section allows you to transfer your files from your Delivery format to the requested format from your endpoint.

You can then select deliver in the top right corner and this will deliver your tracks and associated metadata to your endpoint as you have entered.
