Search
- Playlist Creation
- Managing your Playlists
- Playlist Collaboration
- Reusing Playlists
- Playlist Reporting
Playlist Creation
In this section we'll learn how to create, edit, and access playlists on the front-end of your Synchtank system.
Your playlists can be found in two places:
- At the top within your navigation bar

- To the right of your screen in the playlist icon
Creating a playlist
- To create a playlist select the playlist icon on the right hand side of your screen to show the full playlist panel.
- Next select the plus (+) icon, type in the name of your playlist and select enter
Adding songs to your playlist
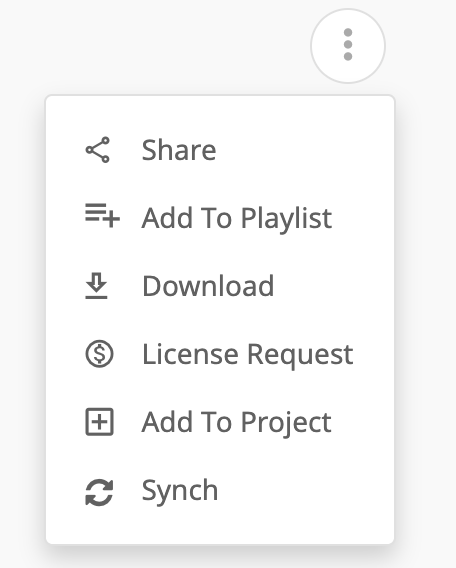
To add a song that is currently playing to your playlist, click the 3 dots icon followed by the plus (+) icon.
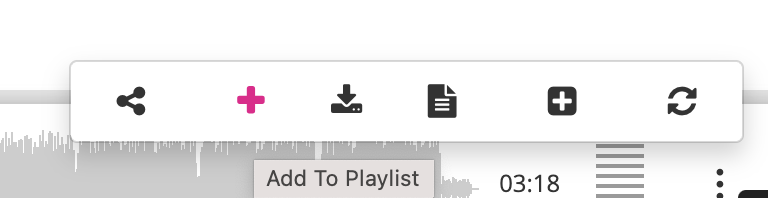
To add a song from the Search, Featured, or Artists pages, press the 3 dots icon and then the add to playlist button for that song.
Note: You cannot have duplicate songs in a playlist.
Managing your Playlists
The Playlist Sidebar allows you to:
- Work on multiple playlists at once
- Drag and drop tracks and albums
- Create 'folders' to group multiple playlists in a nested tree folder structure
- Easily preview, share, copy, edit and download and collaborate from any page
The Playlist Sidebar also allows searching through the playlists managed in the Playlists Sidebar, directly from within the sidebar, returning results as the user enters their search words.
Playlist Collaboration
Collaboration allows you to build playlists cooperatively with other users on the platform. Through collaborating, multiple users can add and update tracks to collectively manage playlists content.
To collaborate on a playlist, you must have the permission required to collaborate. This can be granted in the Synchtank Admin, by setting 'Initiate Collaboration' to yes. The frontend action items for any playlists owned by the current user, will then display a Collaborate option.
To initiate a collaboration, requires just setting two options.
- The collaborator must select if the user they are collaborating with, should be able to edit the playlist they will be collaborating on (as opposed to just viewing it).
- The collaborator must enter the user details they wish to collaborate with. These must be registered system users and the collaborator can select multiple users to collaborate with.
Once the collaboration settings have been filled in and collaboration initiated, the selected users will see the collaborated playlist on their Playlists page. If they were granted edit privileges, they will also be able to edit and update the playlists.
To view updates to playlists being collaborated on, users collaborating will need to refresh the playlist before the changes are visible.
If the owner of the Playlist wishes to end a collaboration, they can do so by accessing the Playlist Collaboration page and removing any users they no longer wish to collaborate with. Collaborators who are not the Playlist owner can also remove themselves from collaboration on a playlist, by clicking delete on that Playlist.
Reusing Playlists
Once a playlist has been created and saved within the system it can be easily reused for individual pitches or future campaigns.
Viewing playlist details:
- Ensure you are logged into the system.
- Note: you must have the proper permissions to proceed, these are established on a user by user basis via the Admin. Please consult your office system administrator if you have questions about your user permissions.
- Once logged in click the playlists link above the top site navigation or in your user menu.
- You'll have the option to Collaborate, Edit, Share, Duplicate, Download all, Delete or Add To Project.
- For the purposes of this article we simply want to verify the playlist you wish to reuse exists within the system.
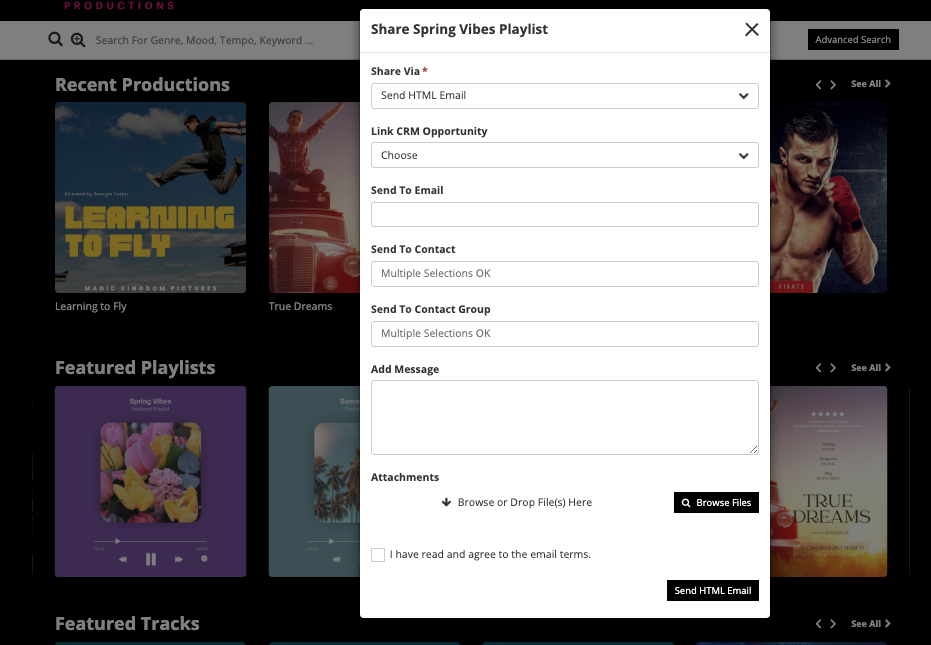
Sharing a previously used playlist:
1. Click the Share button under playlist actions button in the left corner of the page (or at the end of the row on the main playlist listing page).
-
- Optional: In the Share Via Dropdown menu Preview - Email Myself A Preview will send a test email to yourself to quality control the message.
- Optional: In the Share Via Dropdown menu click the Tracking Link - Do NOT Send Email if you intend to send only a tracking link out and not a full email
2. If either Preview or Tracking link are selected some of the fields will not be available.
3. Enter an Email Address (or multiple Email Addresses) in the Send To Email field if you are sending to a specific email address(s).
4. Select the Contact if you want to send to one or multiple contacts.
5. Alternatively, Select the Contact Group or Email List if you intend to distribute to a group.
-
- Optional: Un-check any restrictions you want to be applied to the email.
- Optional: The Template drop-down allows you to choose from available templates for branding purposes.
- Optional: Enter a Subject Line for the email or leave blank if you prefer.
6. Enter a Message for the recipient(s) which will appear in the body of the email.
7. Click Browse Files to add any attachments to the email (or drag and drop the files you wish to attach).
8. Lastly, click the Agree To Terms button and click the Send button.
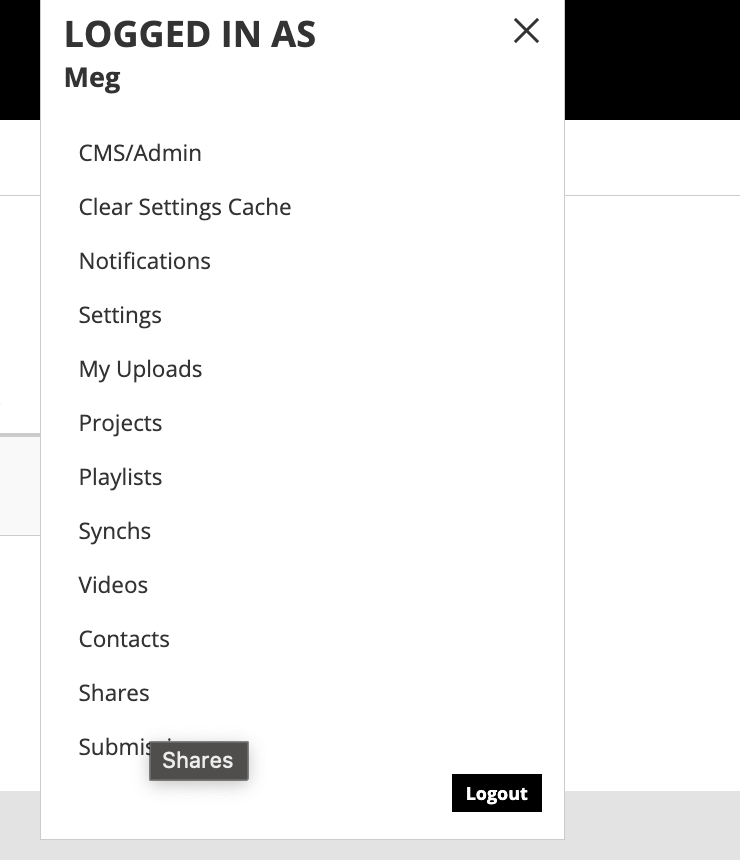
Playlist Reporting
Once you have shared a playlist (and note this only works if you include their email address to ensure tracking) you have the ability to see the results of how many times your viewer has opened, clicked, downloaded the playlist and tracks you sent across.
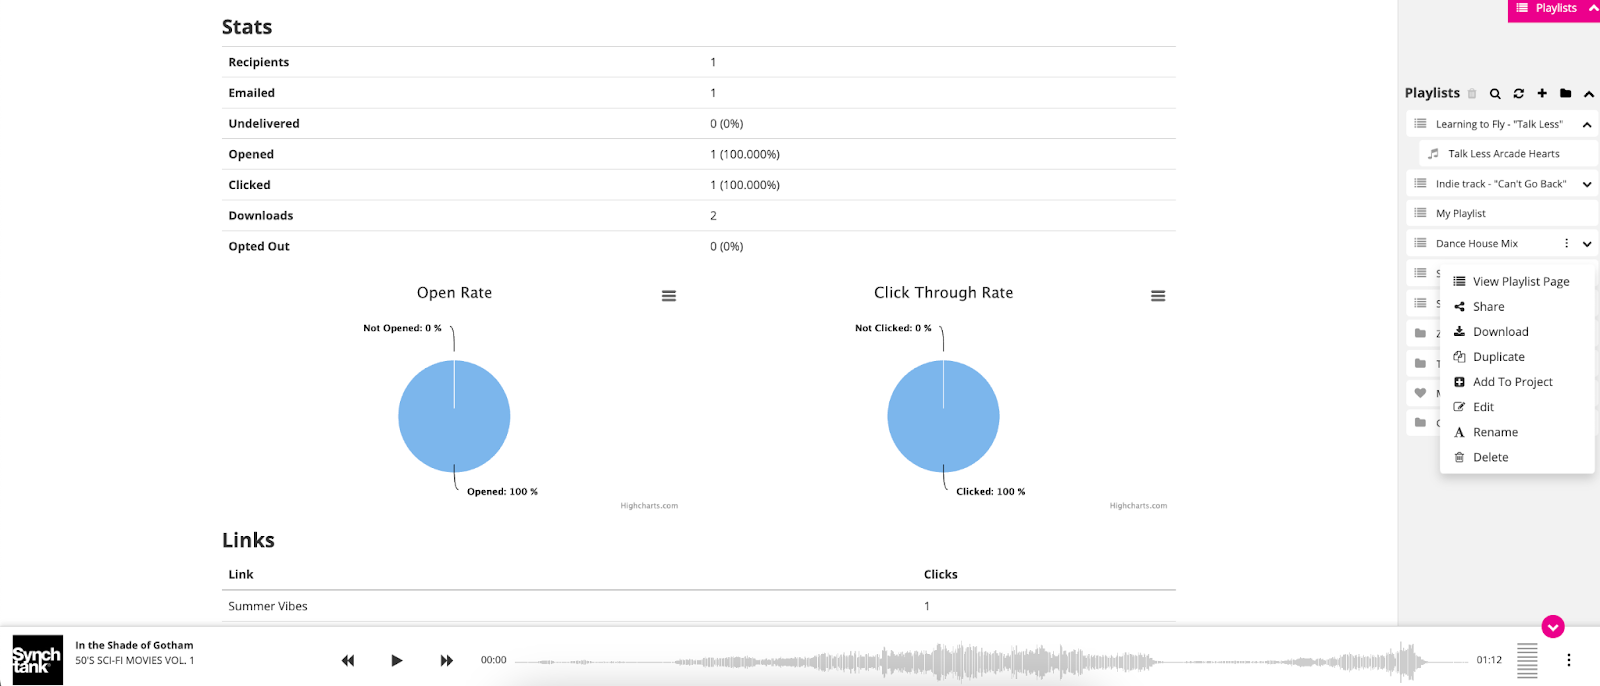
All you need to do is head to the navigation and select the “Shares” option.