Search
Here we look at the methods for adding new tracks to your Synchtank system. The option you choose is best determined by the number of tracks you want to upload.
Note: You must have the proper permissions to proceed, these are established on a user by user basis. Please consult your internal system administrator if you have questions about your user permissions.
Catalog upload (single track)
This allows you to upload a single Metadata file to a specific Master, Composition, Album etc:
- Sign into your Admin and select Catalog from the left hand side navigation.
- Next, navigate to the Masters section (or Tracks for old systems) where you will see a list of all existing masters.
- Click on the green create button which will open the creation page.

- Within this section fill in all required fields - remember the more data you have the better!
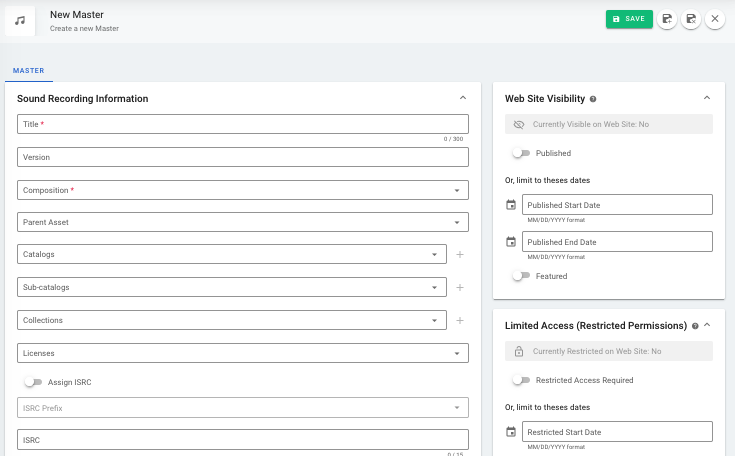
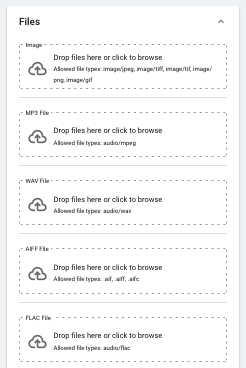
- Next, upload your audio file on the bottom right of the screen, it should look something like the below:
- Once you have entered all required information click the green save button at the top of the page.
Note: if you have created a master this way, you can also use the following methods to edit it. If you do not want to be managing each master individually the below methods can also be used for bulk updates.
Audio Upload (100 tracks or fewer)
Bulk Upload (importing catalog via Audio Files) allows you to create records in the system for masters and compositions using the data embedded in the audio files and add or edit the data during the upload process.
Step 1: Audio Upload
In the first step of the audio upload process you can select which audio files you wish to add to the system.
- From the Admin dashboard select the ‘Import tools’ tab from the left hand side navigation and click the ‘Audio Upload’ button on the sidebar. This will take you to the Bulk upload page which will summarize all previous imports.
Note: if you wish to edit a prior import that has not yet been submitted you can do so from this page. - Select the green create button in the top right corner.
- Upload your audio files by browsing the tracks on your local or network drive, making sure you include the title of the upload and the description.
- Holding down the shift key will allow you to select multiple tracks.
Note: make sure not to refresh or leave the upload screen while your file(s) are uploading and that uploads cannot exceed 2GB.
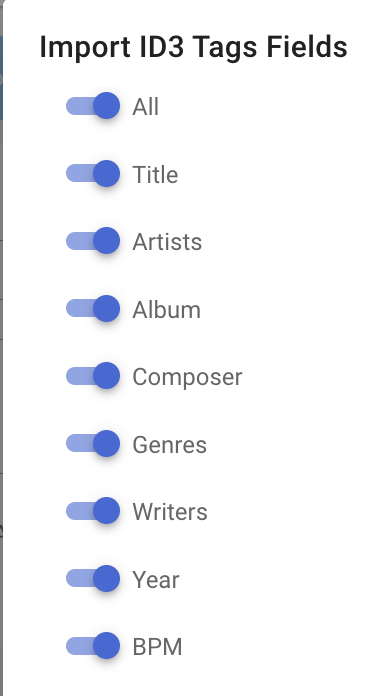
- You can choose to import ID3 tags embedded in your MP3s by selecting the ‘Import ID3 Tags’ toggle. You can then select which ID3 tags you wish to import.

- Once set, select “Continue” in the top right corner.
Step 2: Metadata
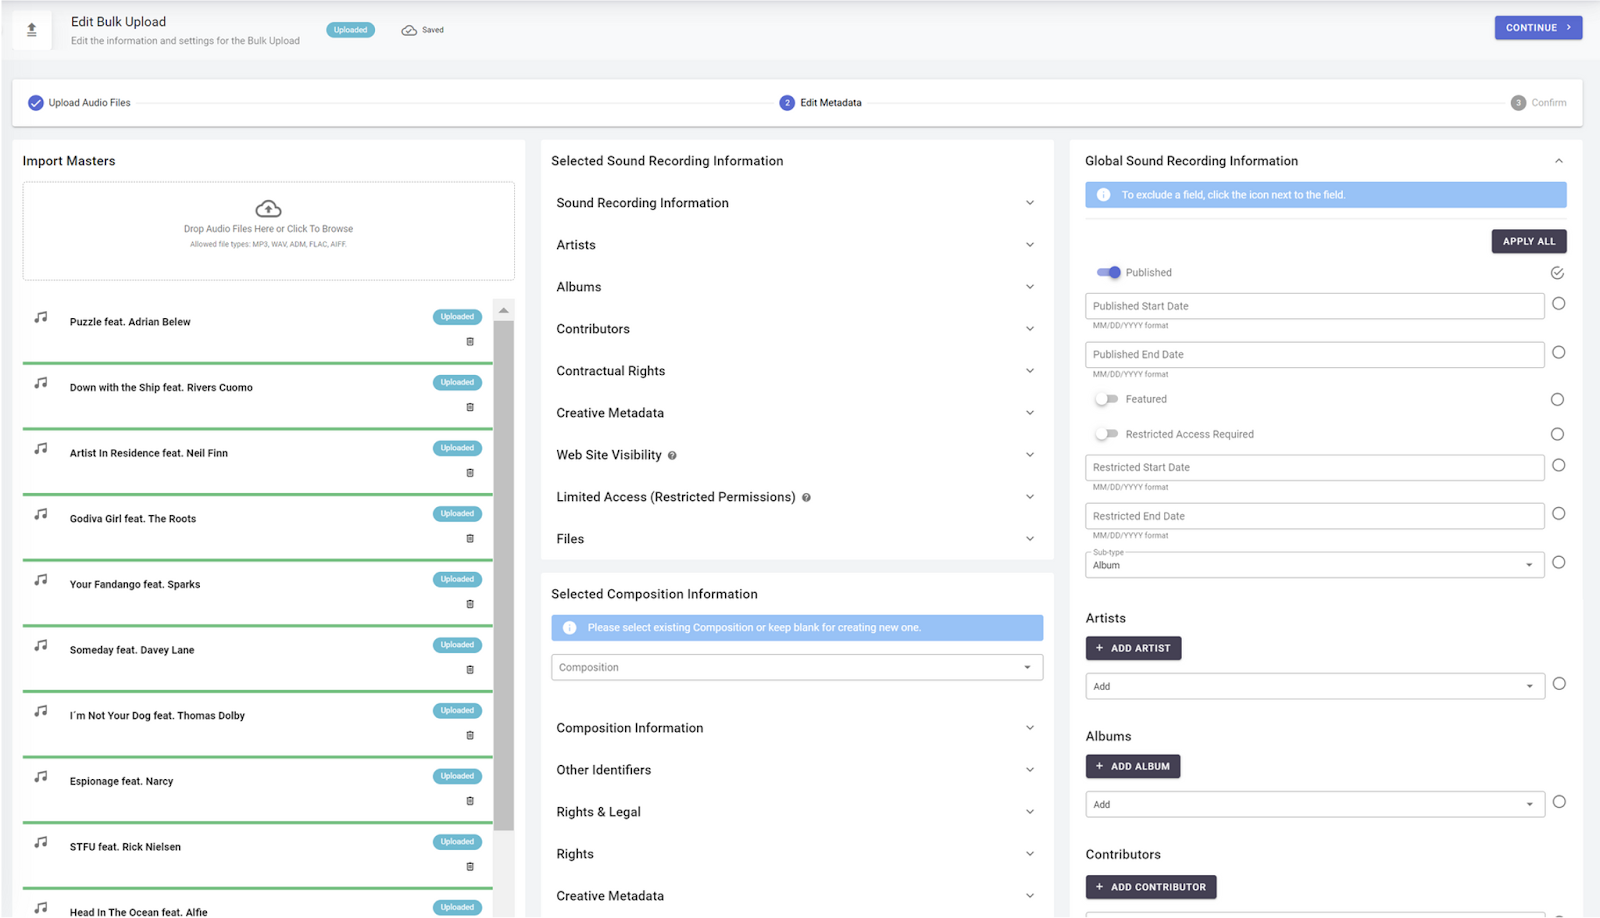
On the second page of the upload process you can set metadata for the tracks in your upload. The page is divided into three columns as follows:
- Import Masters - a list of all the masters included in the upload
- Selected Sound Recording Information - where you can input metadata for the individual master selected on the left hand side
- Global Sound Recording Information - where you can bulk edit data for all the masters in the upload
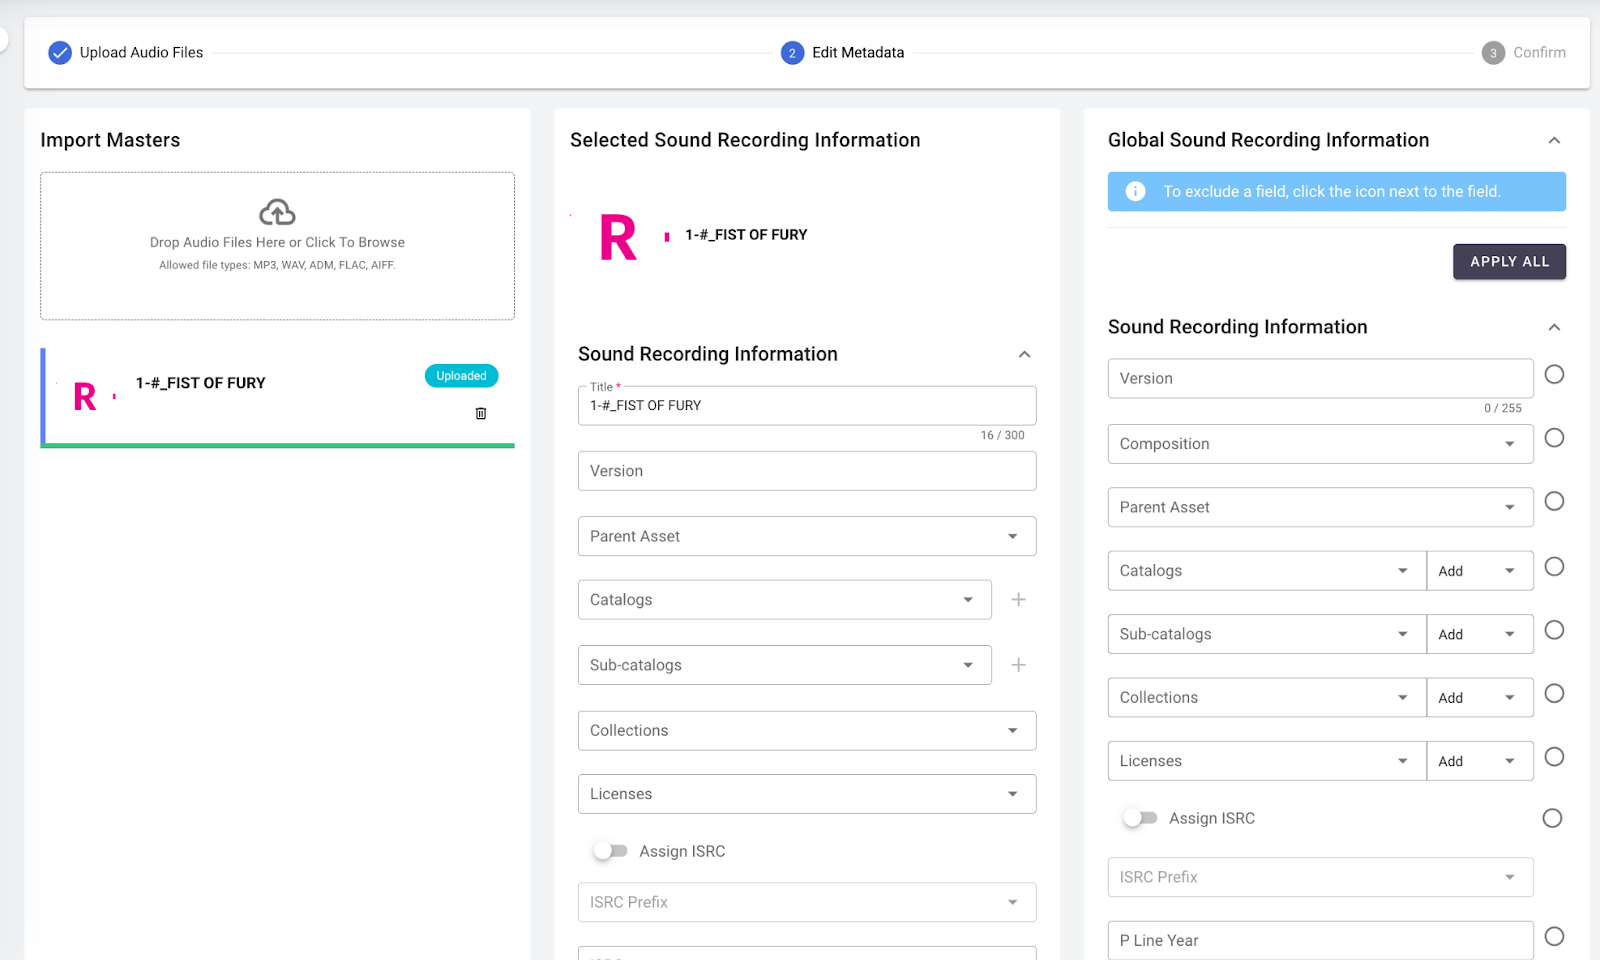
- Fill out the desired metadata in accordance with the tips listed below.
- Select confirm at the top of the page.
- You will receive a system notification in the top right corner of your browser window when the process is complete. You'll also receive a reminder which will show up on the Admin dashboard.
Metadata Input Tips:
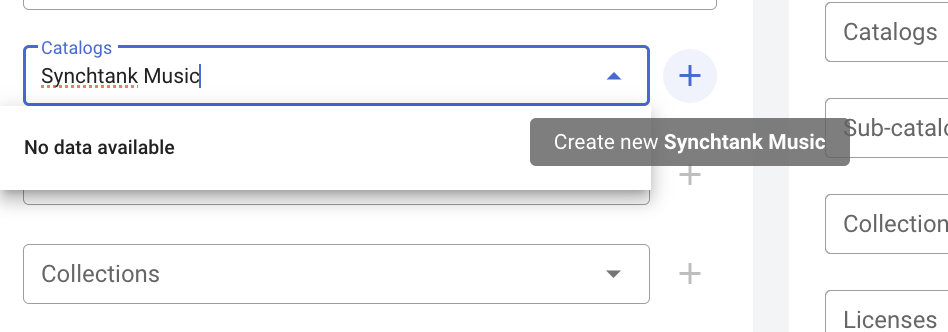
- In the selected Sound Recording column, you can select metadata from the metadata dropdowns but you can also create new metadata tags using the + button. For example, to add a new catalog you type in the name of the required catalog and press + and this will add it to the system.
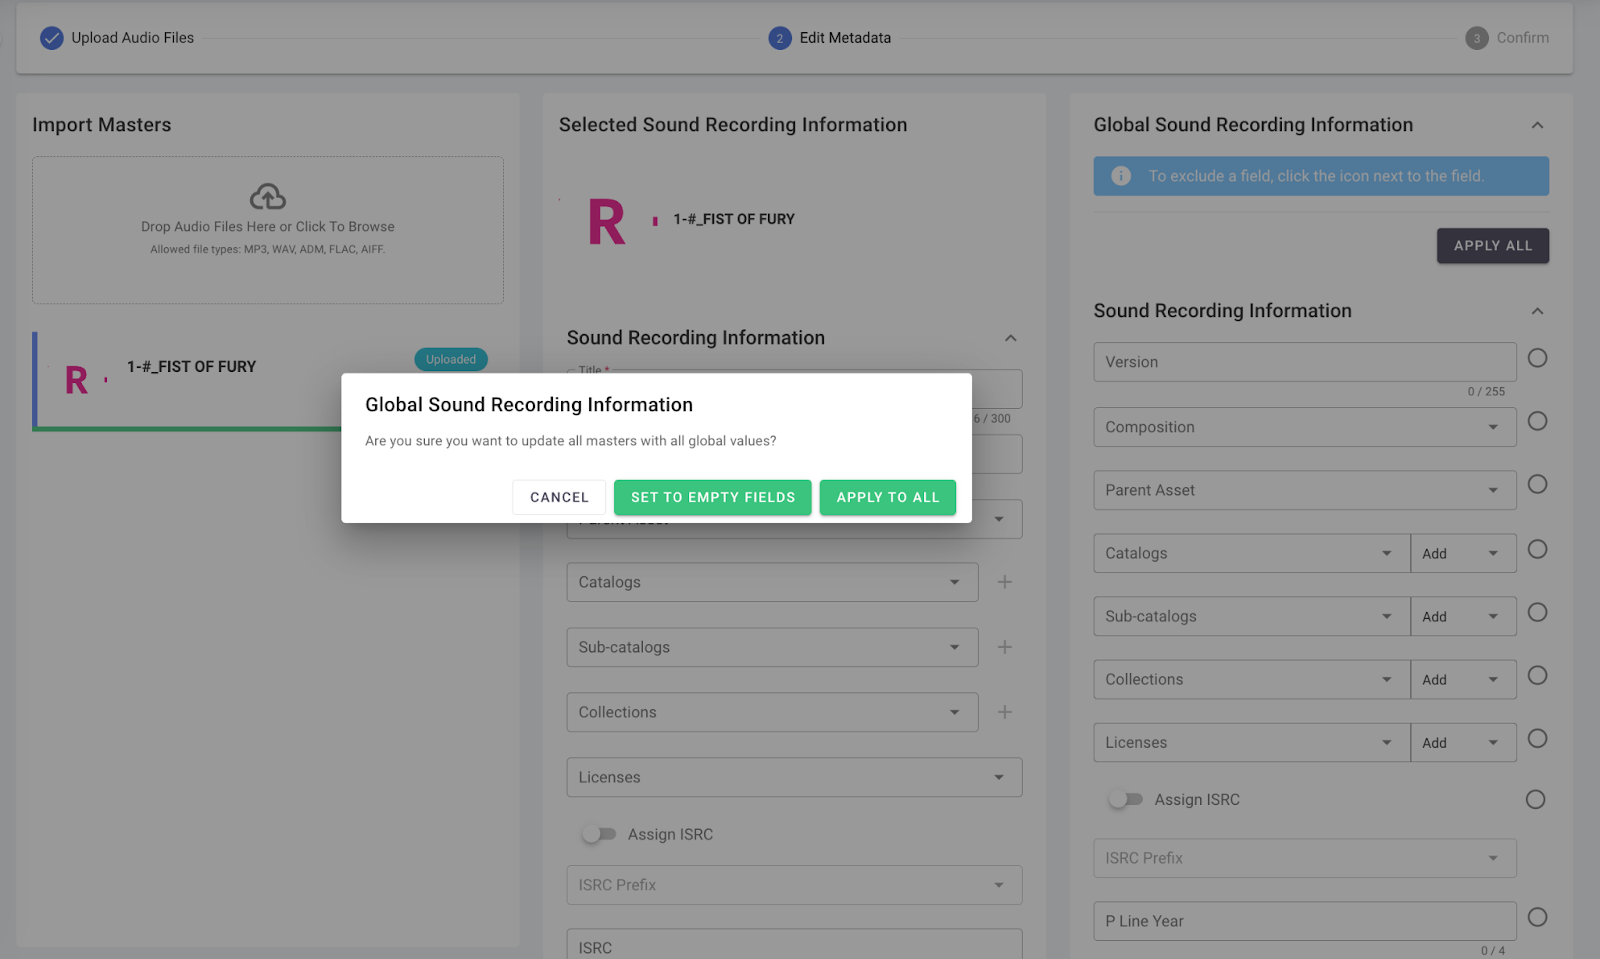
- In the Global Sound Recording Information column you can use the Apply All button to add the metadata to all the sound recordings in the upload. You can choose to add the metadata only to empty fields which will apply this change only when there is no pre-existing metadata or select Apply to All to overwrite any data that may already be stored for individual sound recordings.
- When using the Apply All feature you can choose which fields you want to update using the checkboxes on the right.
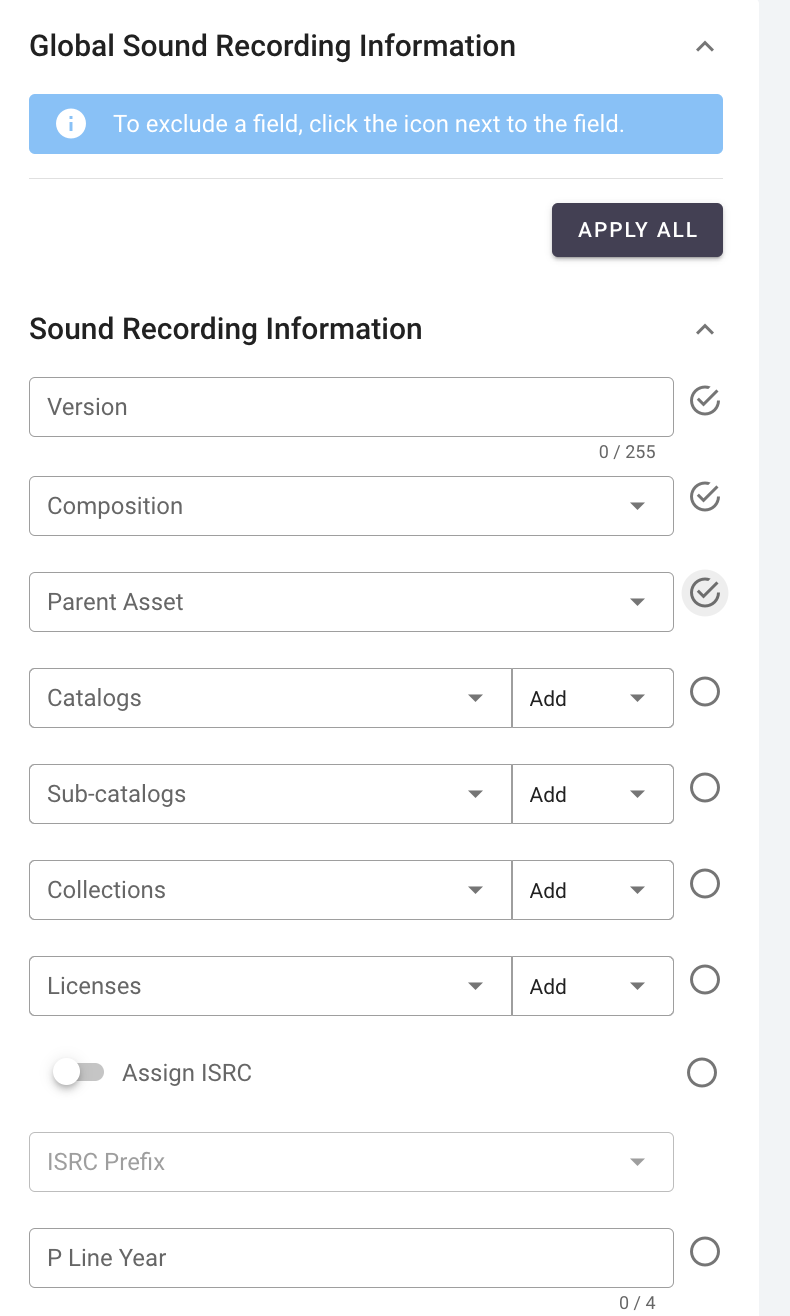
- For some fields in the Global Sound Recording Information column you can choose which action you would like to perform: Add, Replace or Remove. For example if you would like to remove a particular catalog from all the sound recordings you can select that catalog and then set it to Remove.
- In the Global Sound Recording Information column you can upload artwork and apply it to all the sound recordings. For example if you are using the import tools to upload a single album you can upload the artwork once and apply it to all tracks in that album.
Spreadsheet upload
The spreadsheet upload tab allows the user to update and manage metadata using a spreadsheet import. This import must use the Synchtank templates.
Report Generation:
To generate a template using the following steps:
- Click New Report on any page OR go to the reports tab and select the desired report type

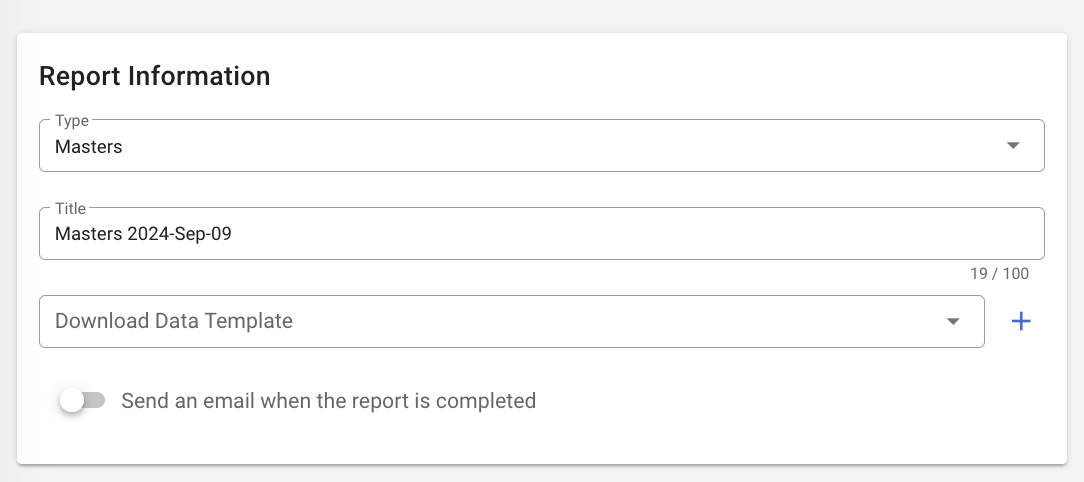
- Filter the report as per your requirements. For example you may want to update the metadata for masters uploaded in the past week, in which case you can filter by items added.
- Click Save and wait for the report to run. This can take up to 30 minutes depending on how many items are in the report
- Download the report from the reports page
Report Editing:
This report is the template that will be used during spreadsheet uploads. This format should not be edited except as follows:
- You can delete unneeded columns. For example if you are not planning on updating genres, the genres column in its entirety can be removed.
Note: the ID column must always be present and in first place. - You can delete unneeded rows. For example if you are only planning on editing the metadata for the first 50 masters in the report, you can delete all rows past the first 50. These rows must be delete in their entirety.
- If you wish to bulk delete or bulk create entities using a spreadsheet import, please contact your account manager who can walk you through the process.
Report Upload:
To apply the changes made in the template to the system, using the following steps:
- From the Admin dashboard select the ‘Import tools’ tab from the sidebar navigation and click the ‘Spreadsheet Upload’ button. This will take you to the batch imports page.
- Click “Import spreadsheet” in the top right corner. Select the spreadsheet type. In the case of batch importing masters, please select “Masters”’
- Upload your edited template spreadsheet and click Save
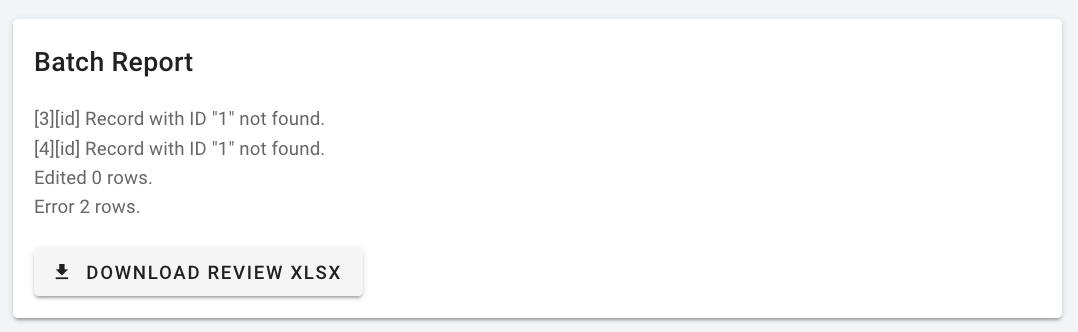
- The spreadsheet upload page will alert you to the following:
- Status of the upload
- How many items have been edited so far
- Any errors with the upload. For example if you have inputted only a year in a field that requires a date the system will display an alert. You can see the error details by going to the details page. If you do receive an error please correct them and reimport the spreadsheet.
- You will receive a system notification in the top right corner of your browser window when the process is complete. You'll also receive a reminder which will show up on the Admin dashboard.
Additional info
Automated Ingest:
For large scale, regular deliveries or initial backlog onboarding Synchtank can set up automated ingestion from S3. Please contact your account manager for further details.
Managing Duplicates
There are processes in the system that will compare audio file options and disallow duplicate uploads. Please contact your account manager for further details.
File Upload Format
Any track uploaded on the system will automatically be converted to MP3. Other formats are available upon request.
Autotagging
All system uploads will automatically be autotagged if this is enabled. Note the autotagging process can sometimes take several hours to process all the tracks in an upload.