Search
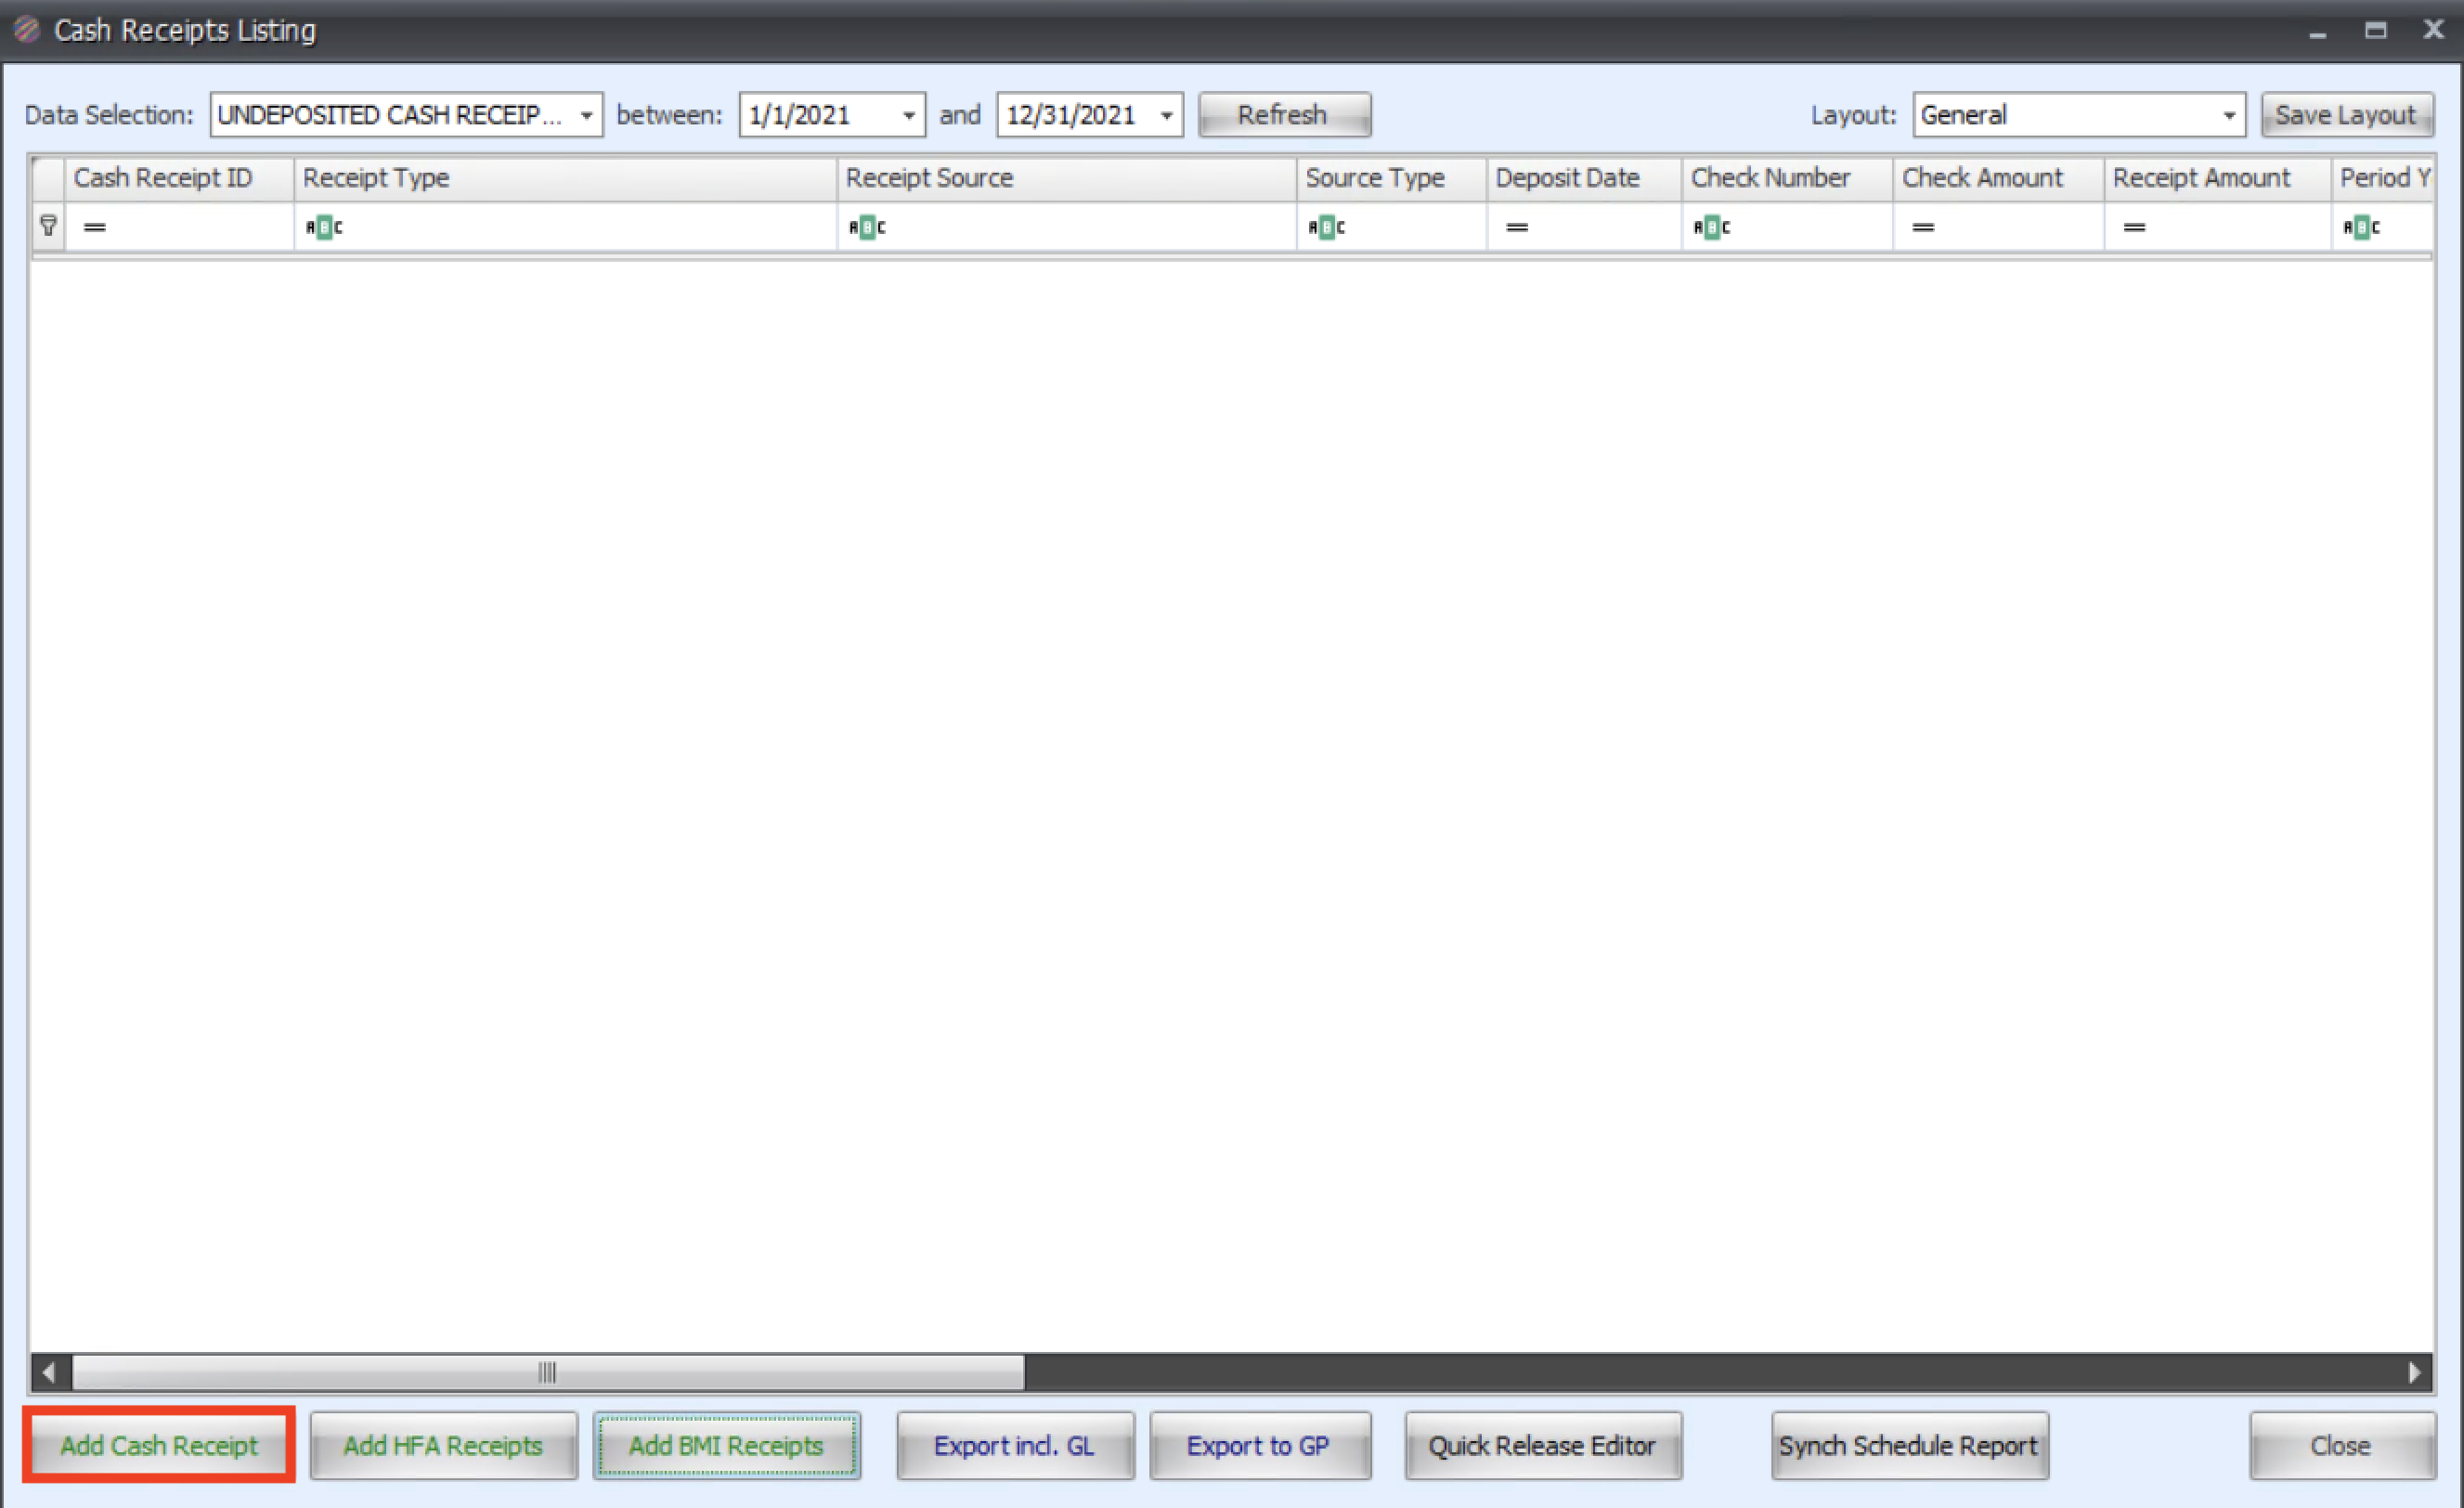
- In the Accounting/Financial tab of the IRIS ribbon click on Add Cash Receipt.

- Then click Add Cash Receipt at the bottom of the window.
- In the next window: Enter Receipt Source and click the dropdown and choose deposit.
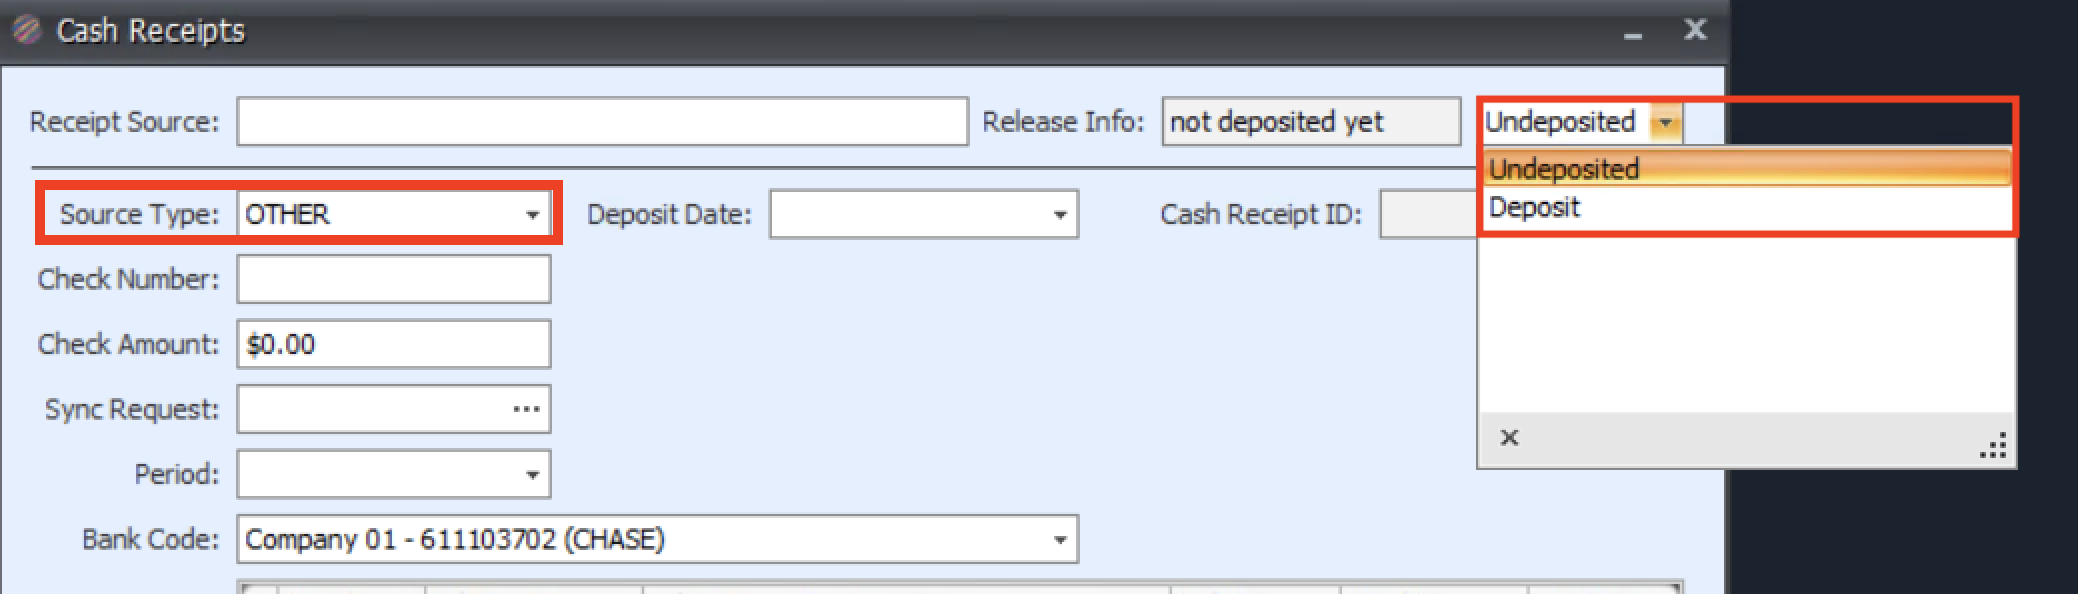
- Then open the Source Type dropdown and select OTHER.
- Fill in the following fields: Deposit date, check number, amount and Period.
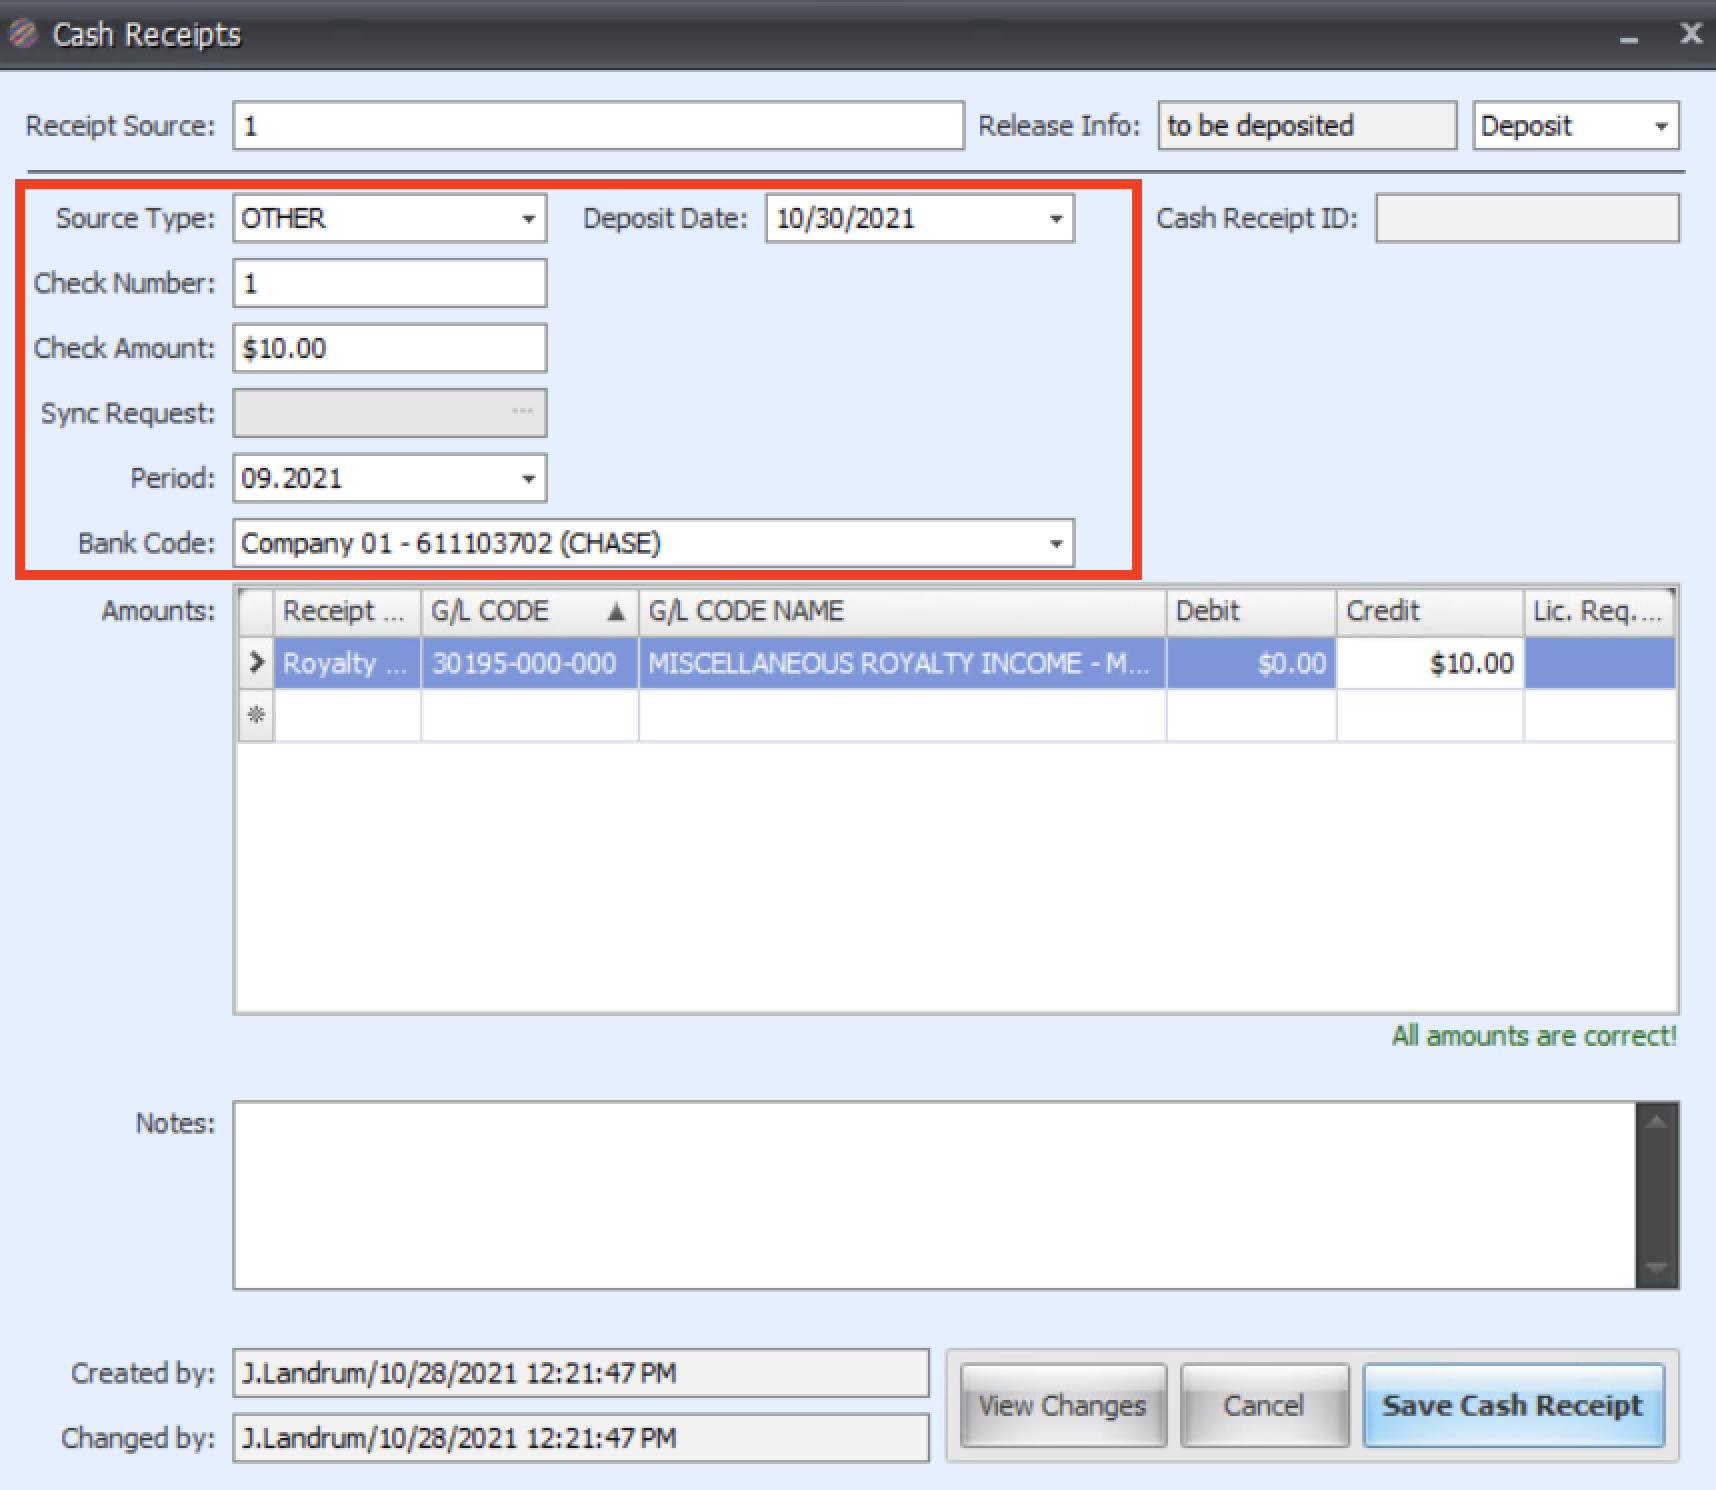
- The Bank Code you can enter through the URL. Choose the bank code.
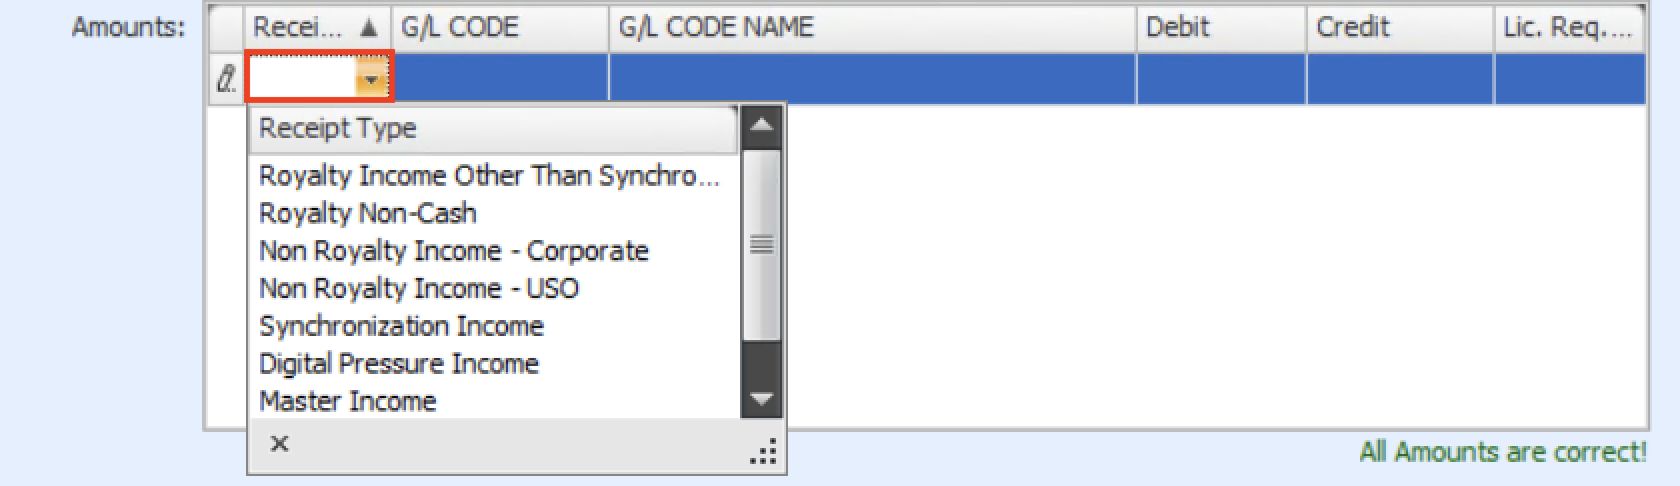
- In the Amounts section: click on the ... in the Receipt type cell and select the correct type, for any other type select Royalty Other than Synch.
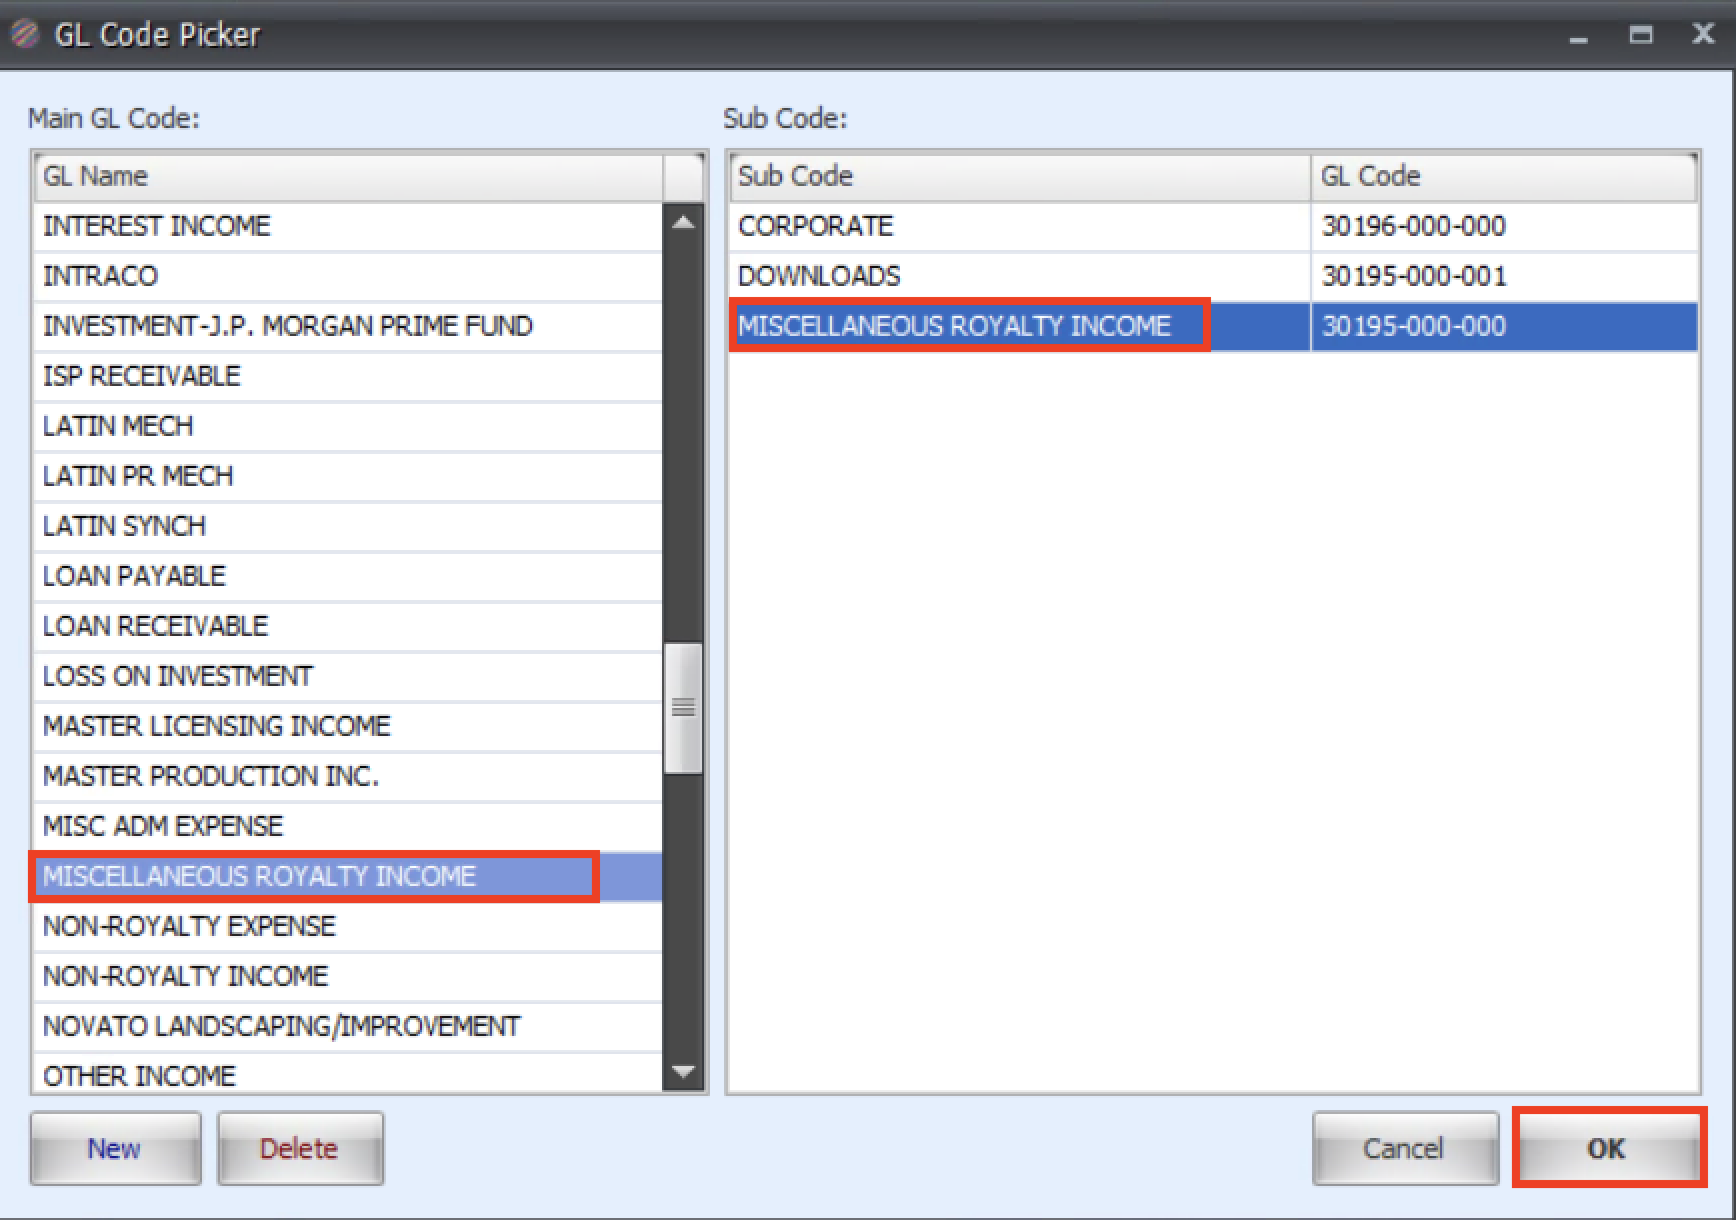
- In the G/L Code Name cell click on the ... and then scroll down and select Miscellaneous Royalty Income, click Miscellaneous Royalty Income again on the right hand list and then click OK.
- Put the amount into the debit or credit cells.
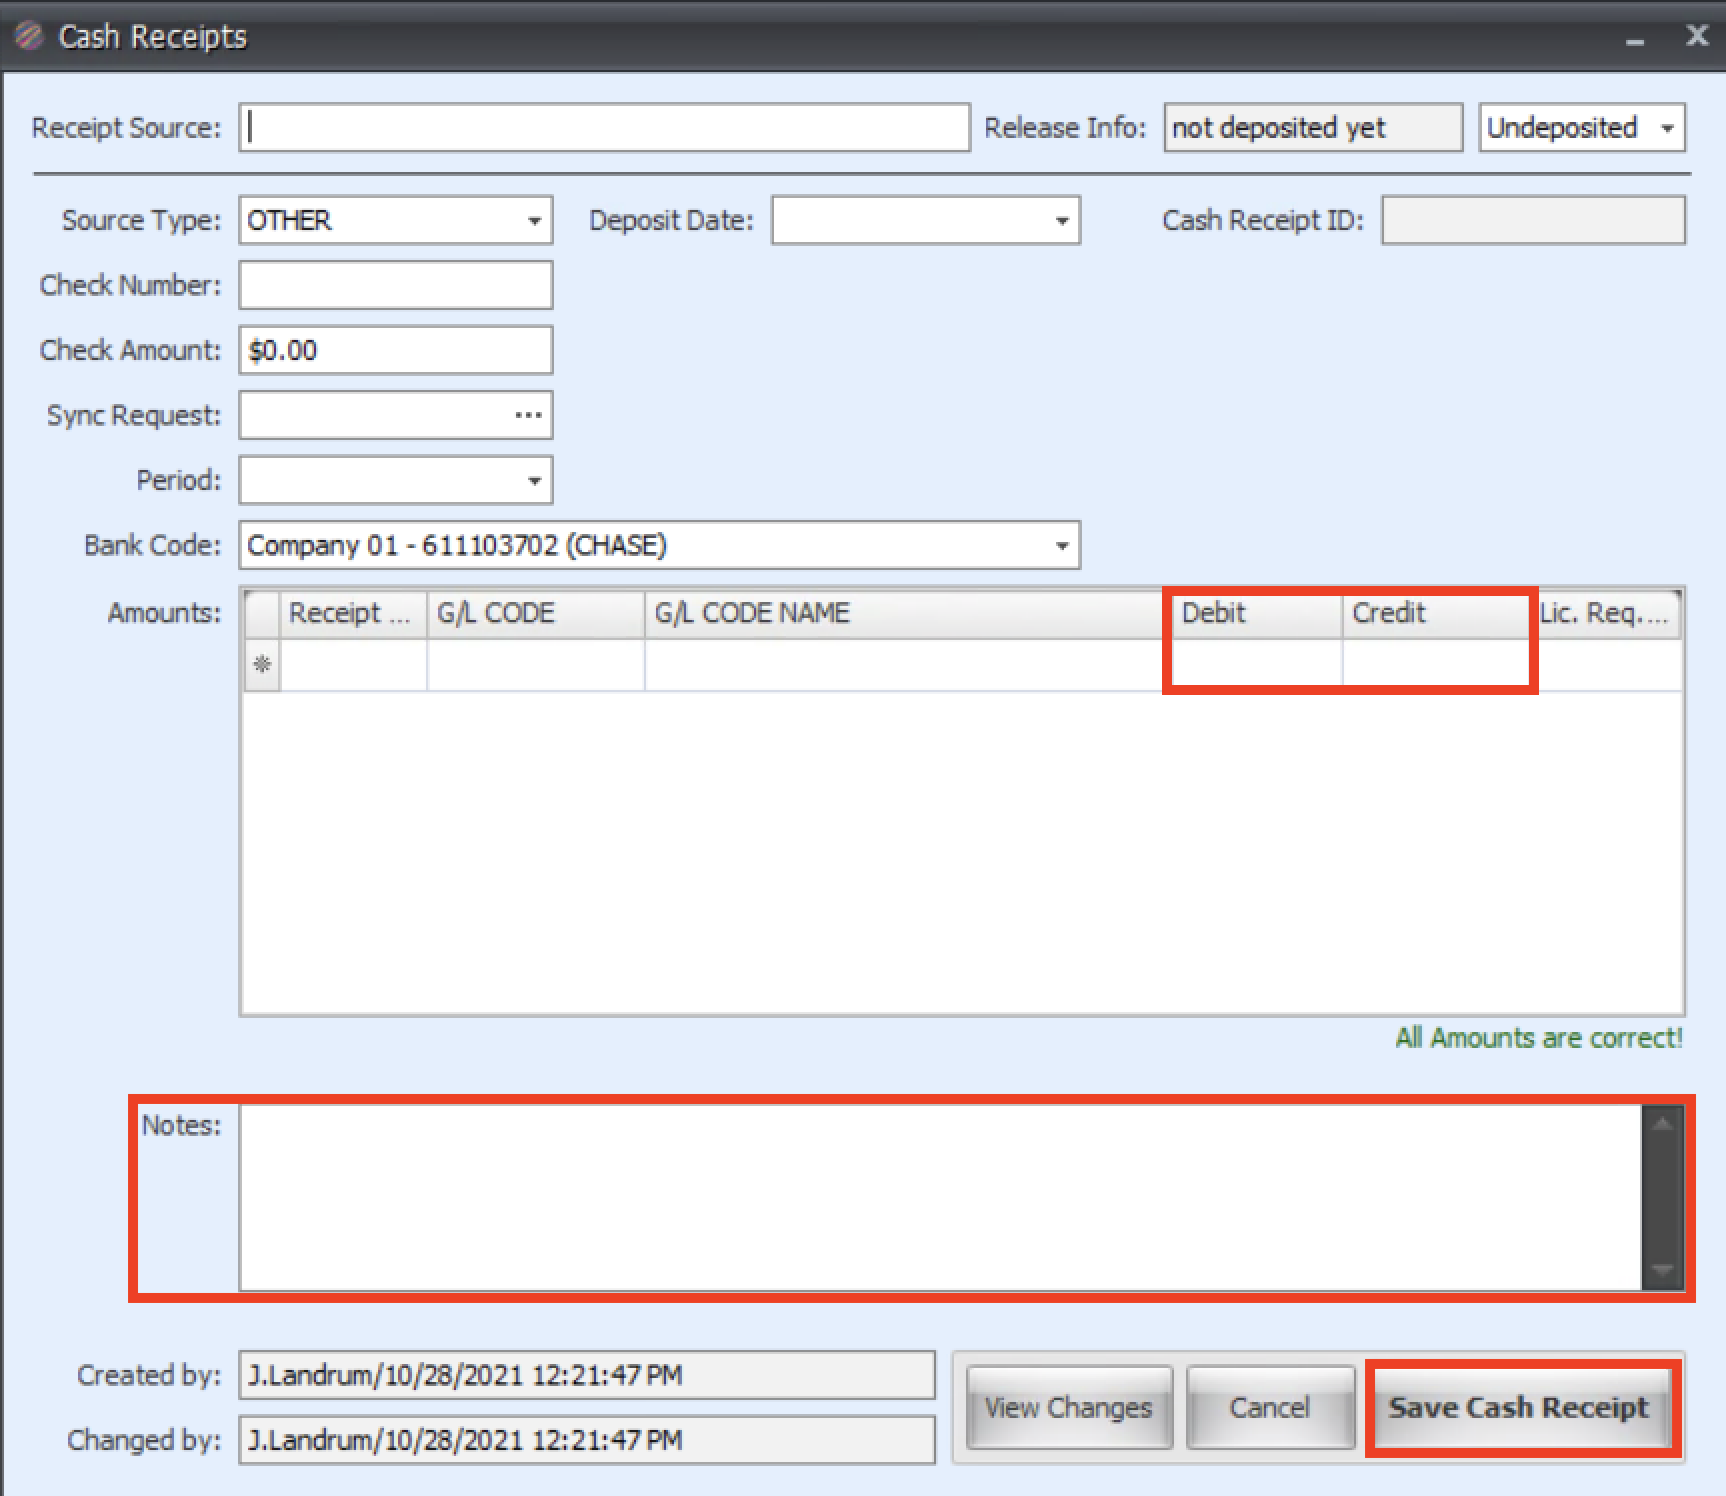
- Add any notes to the Notes field, then click Save Cash Receipt.
- You'll get confirmation of creation and the number is assigned.
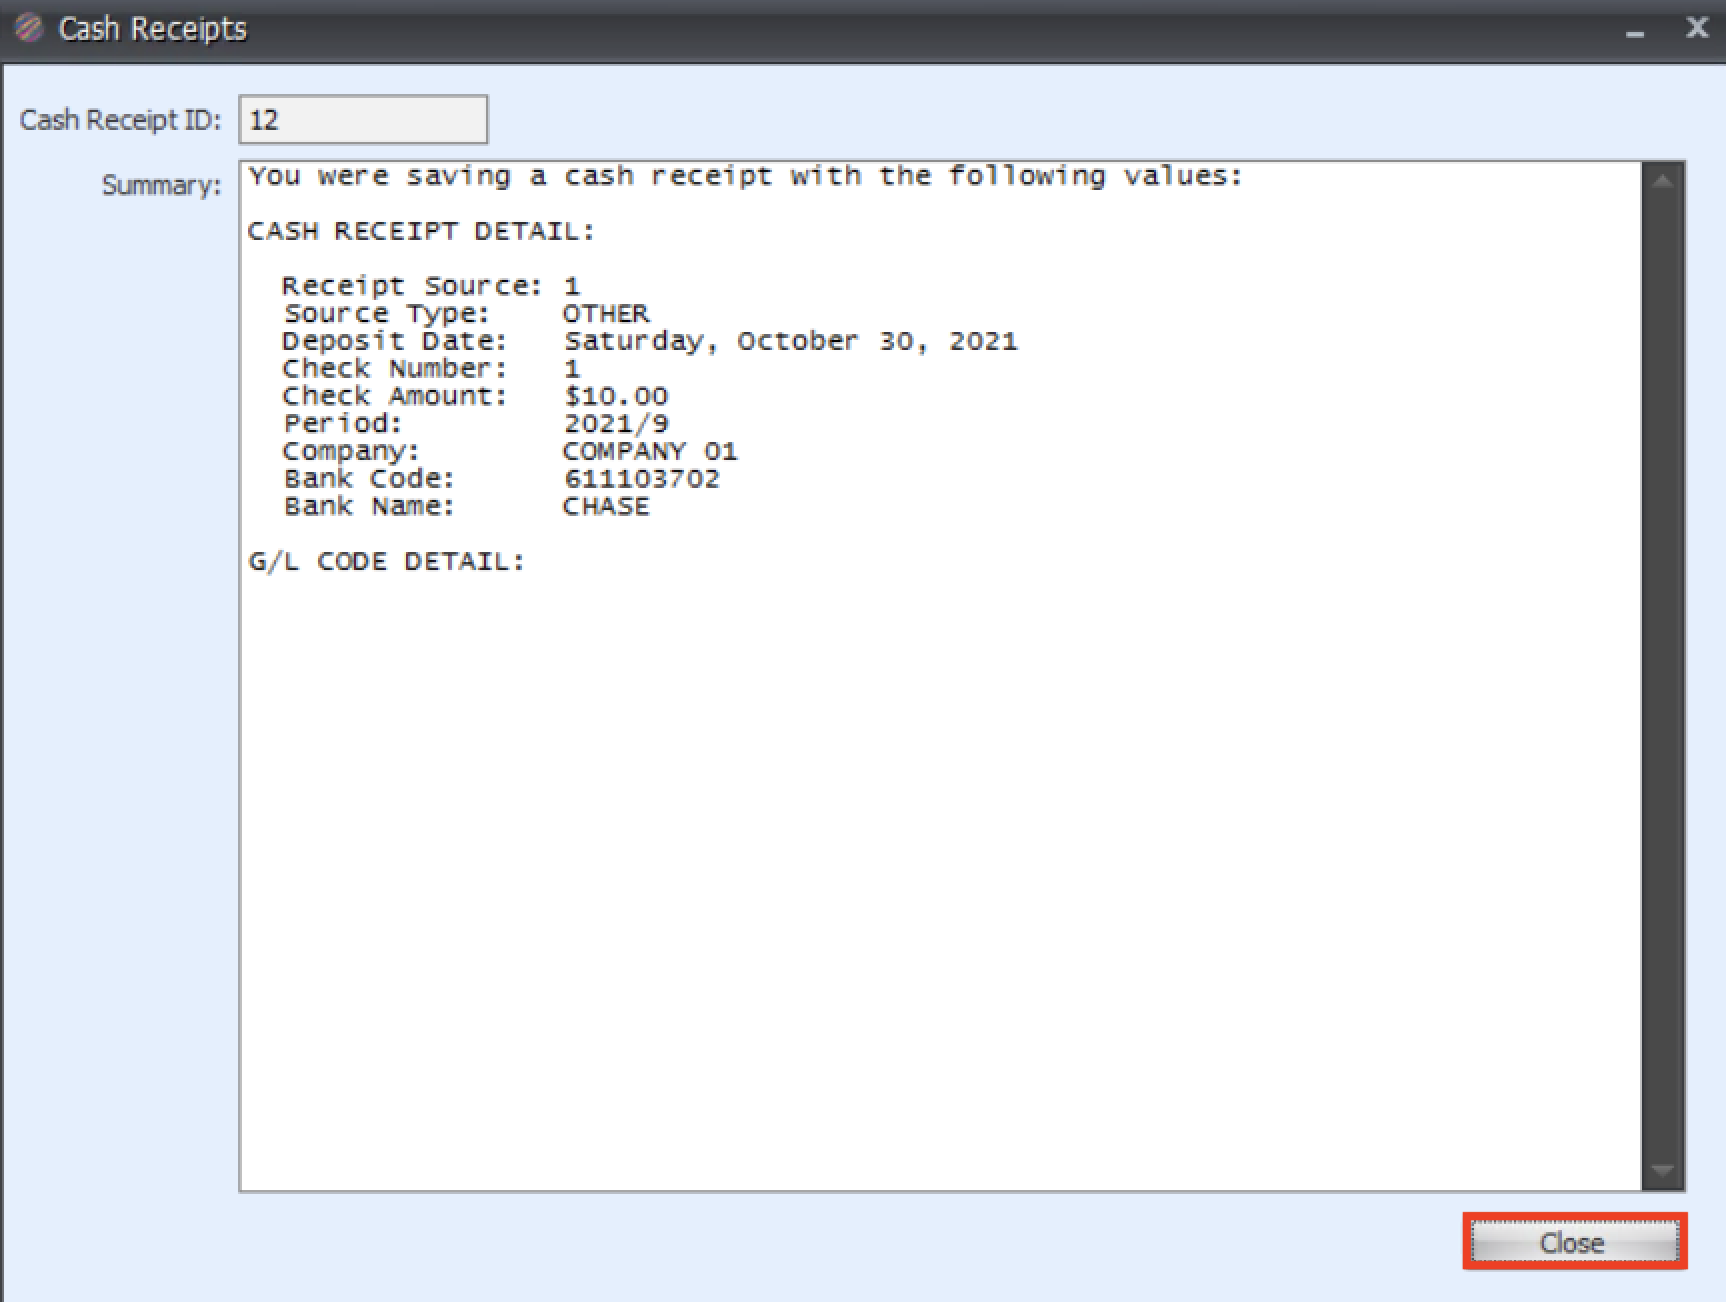
- Click close.
- From the main window, choose All Cash Receipts from the dropdown and click Refresh, you should see your cash receipt there.
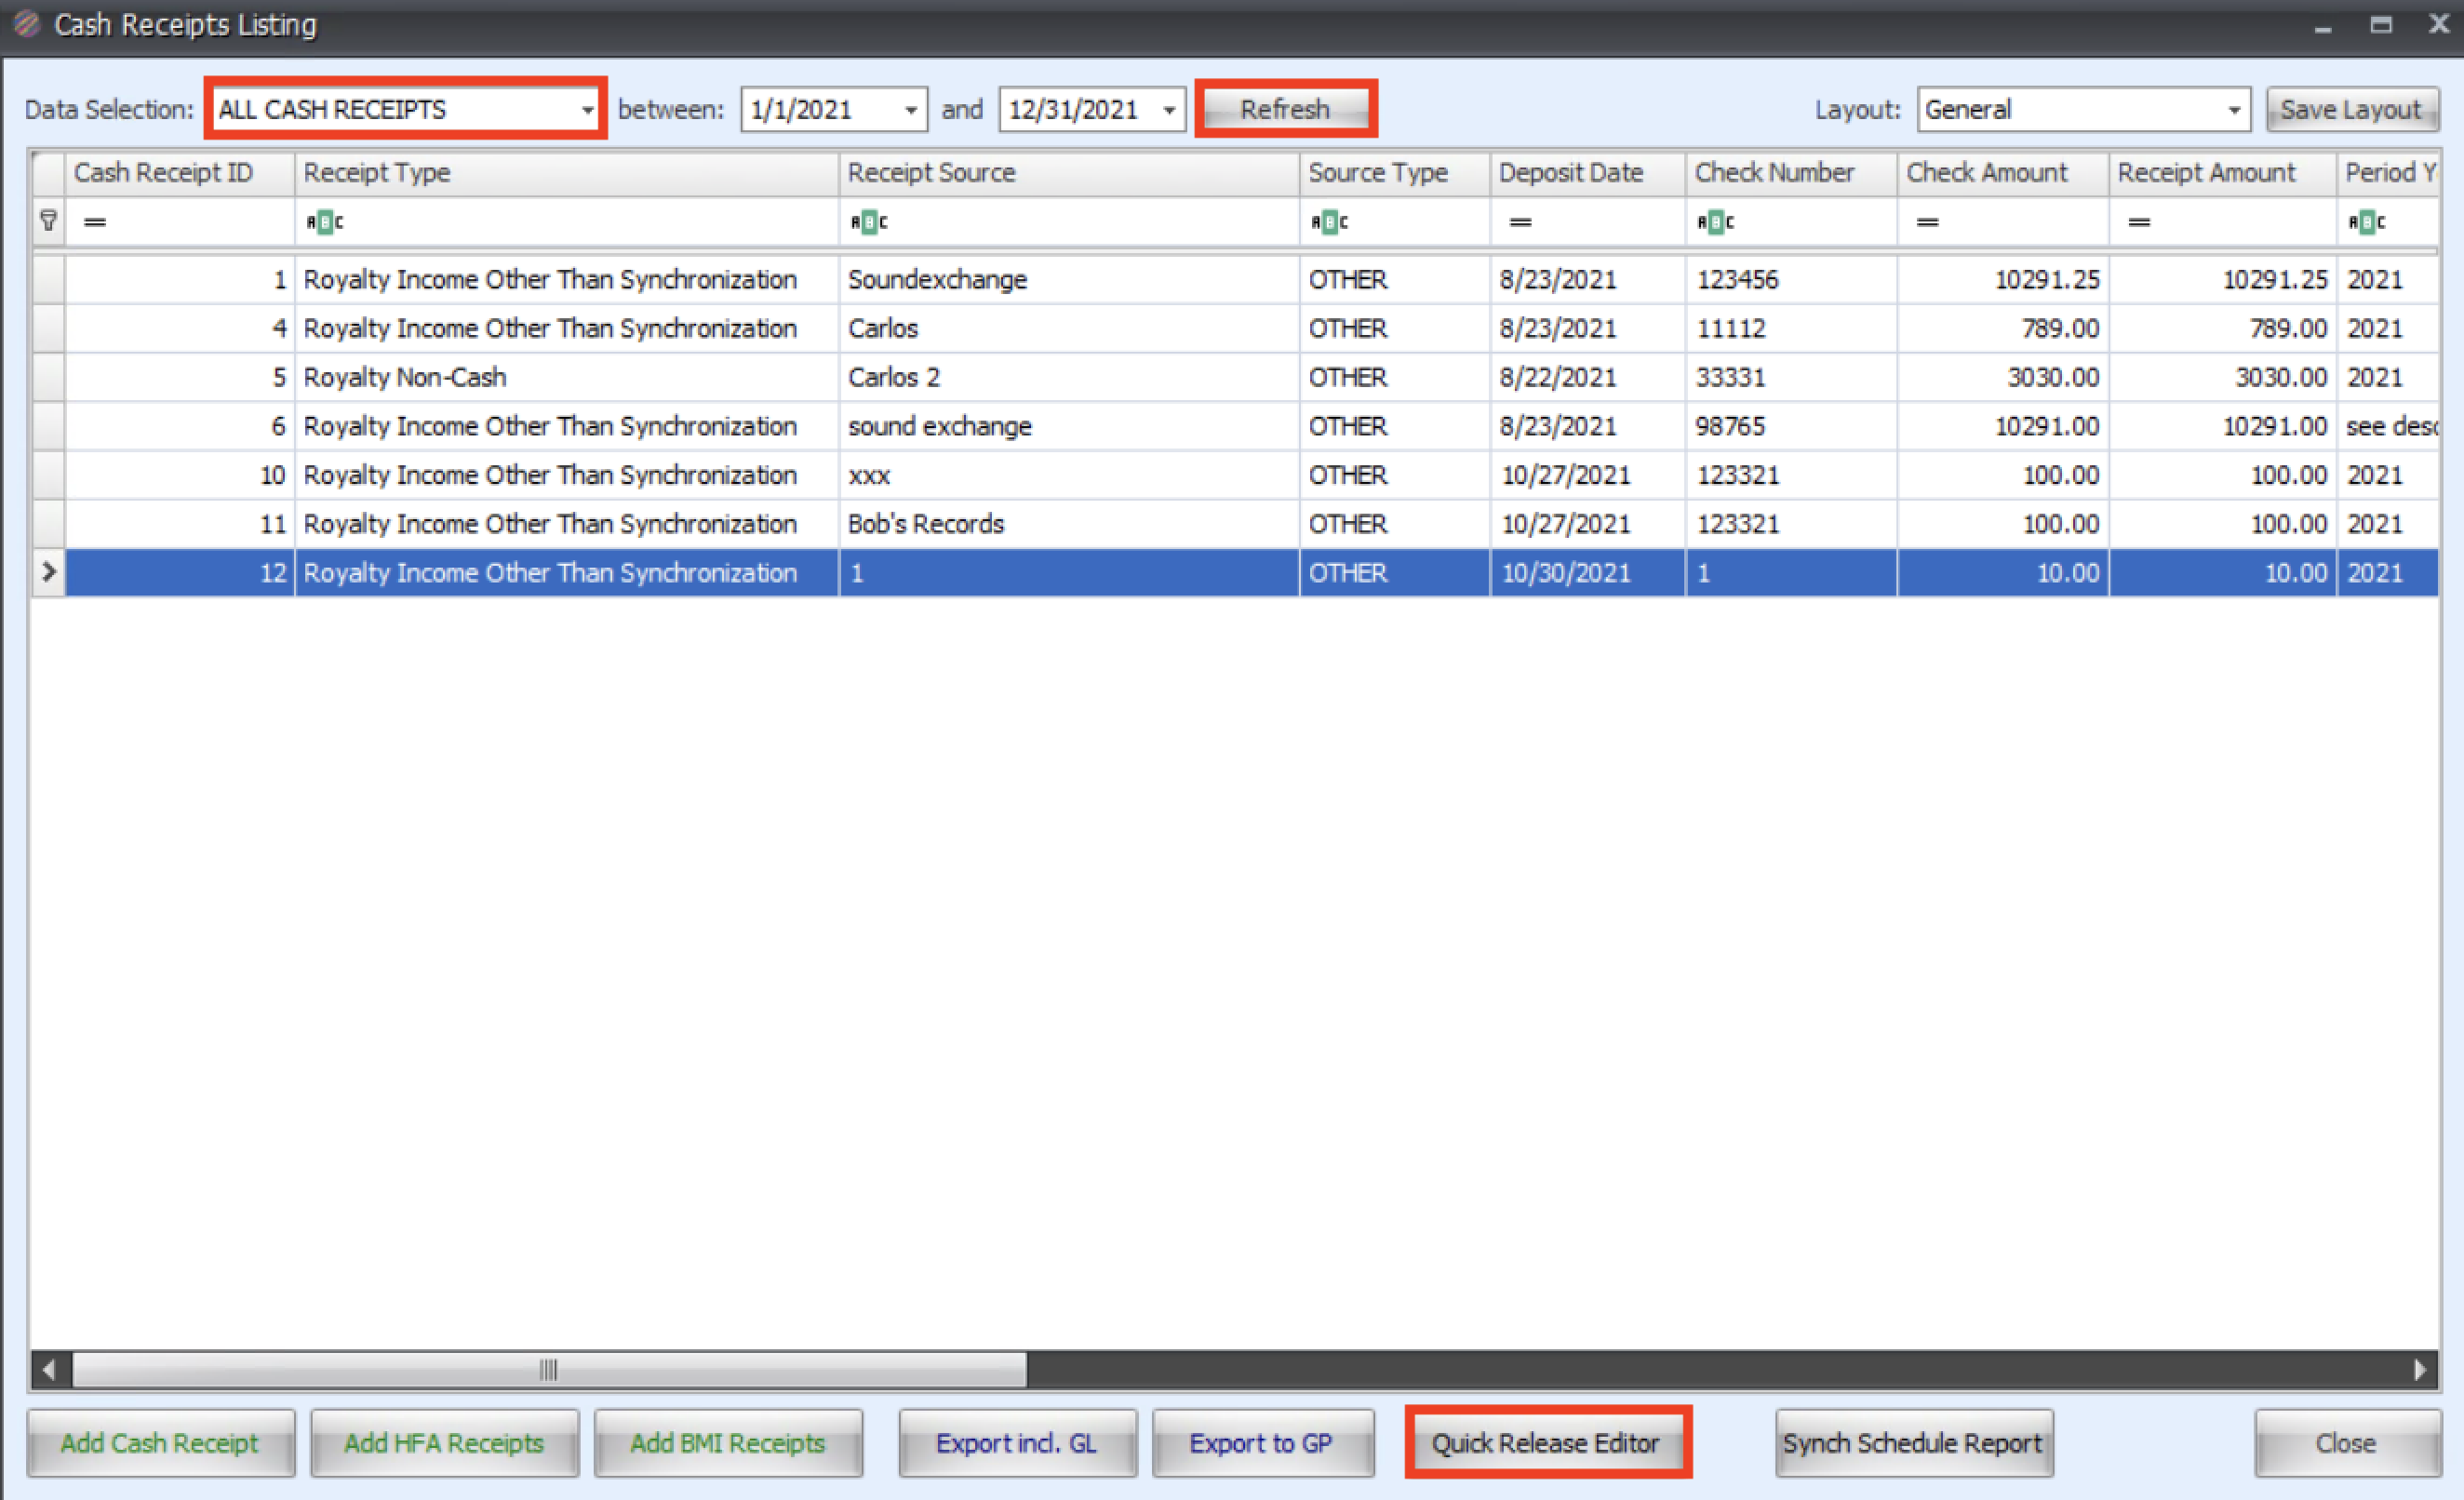
- Click Quick Release Editor at the bottom.
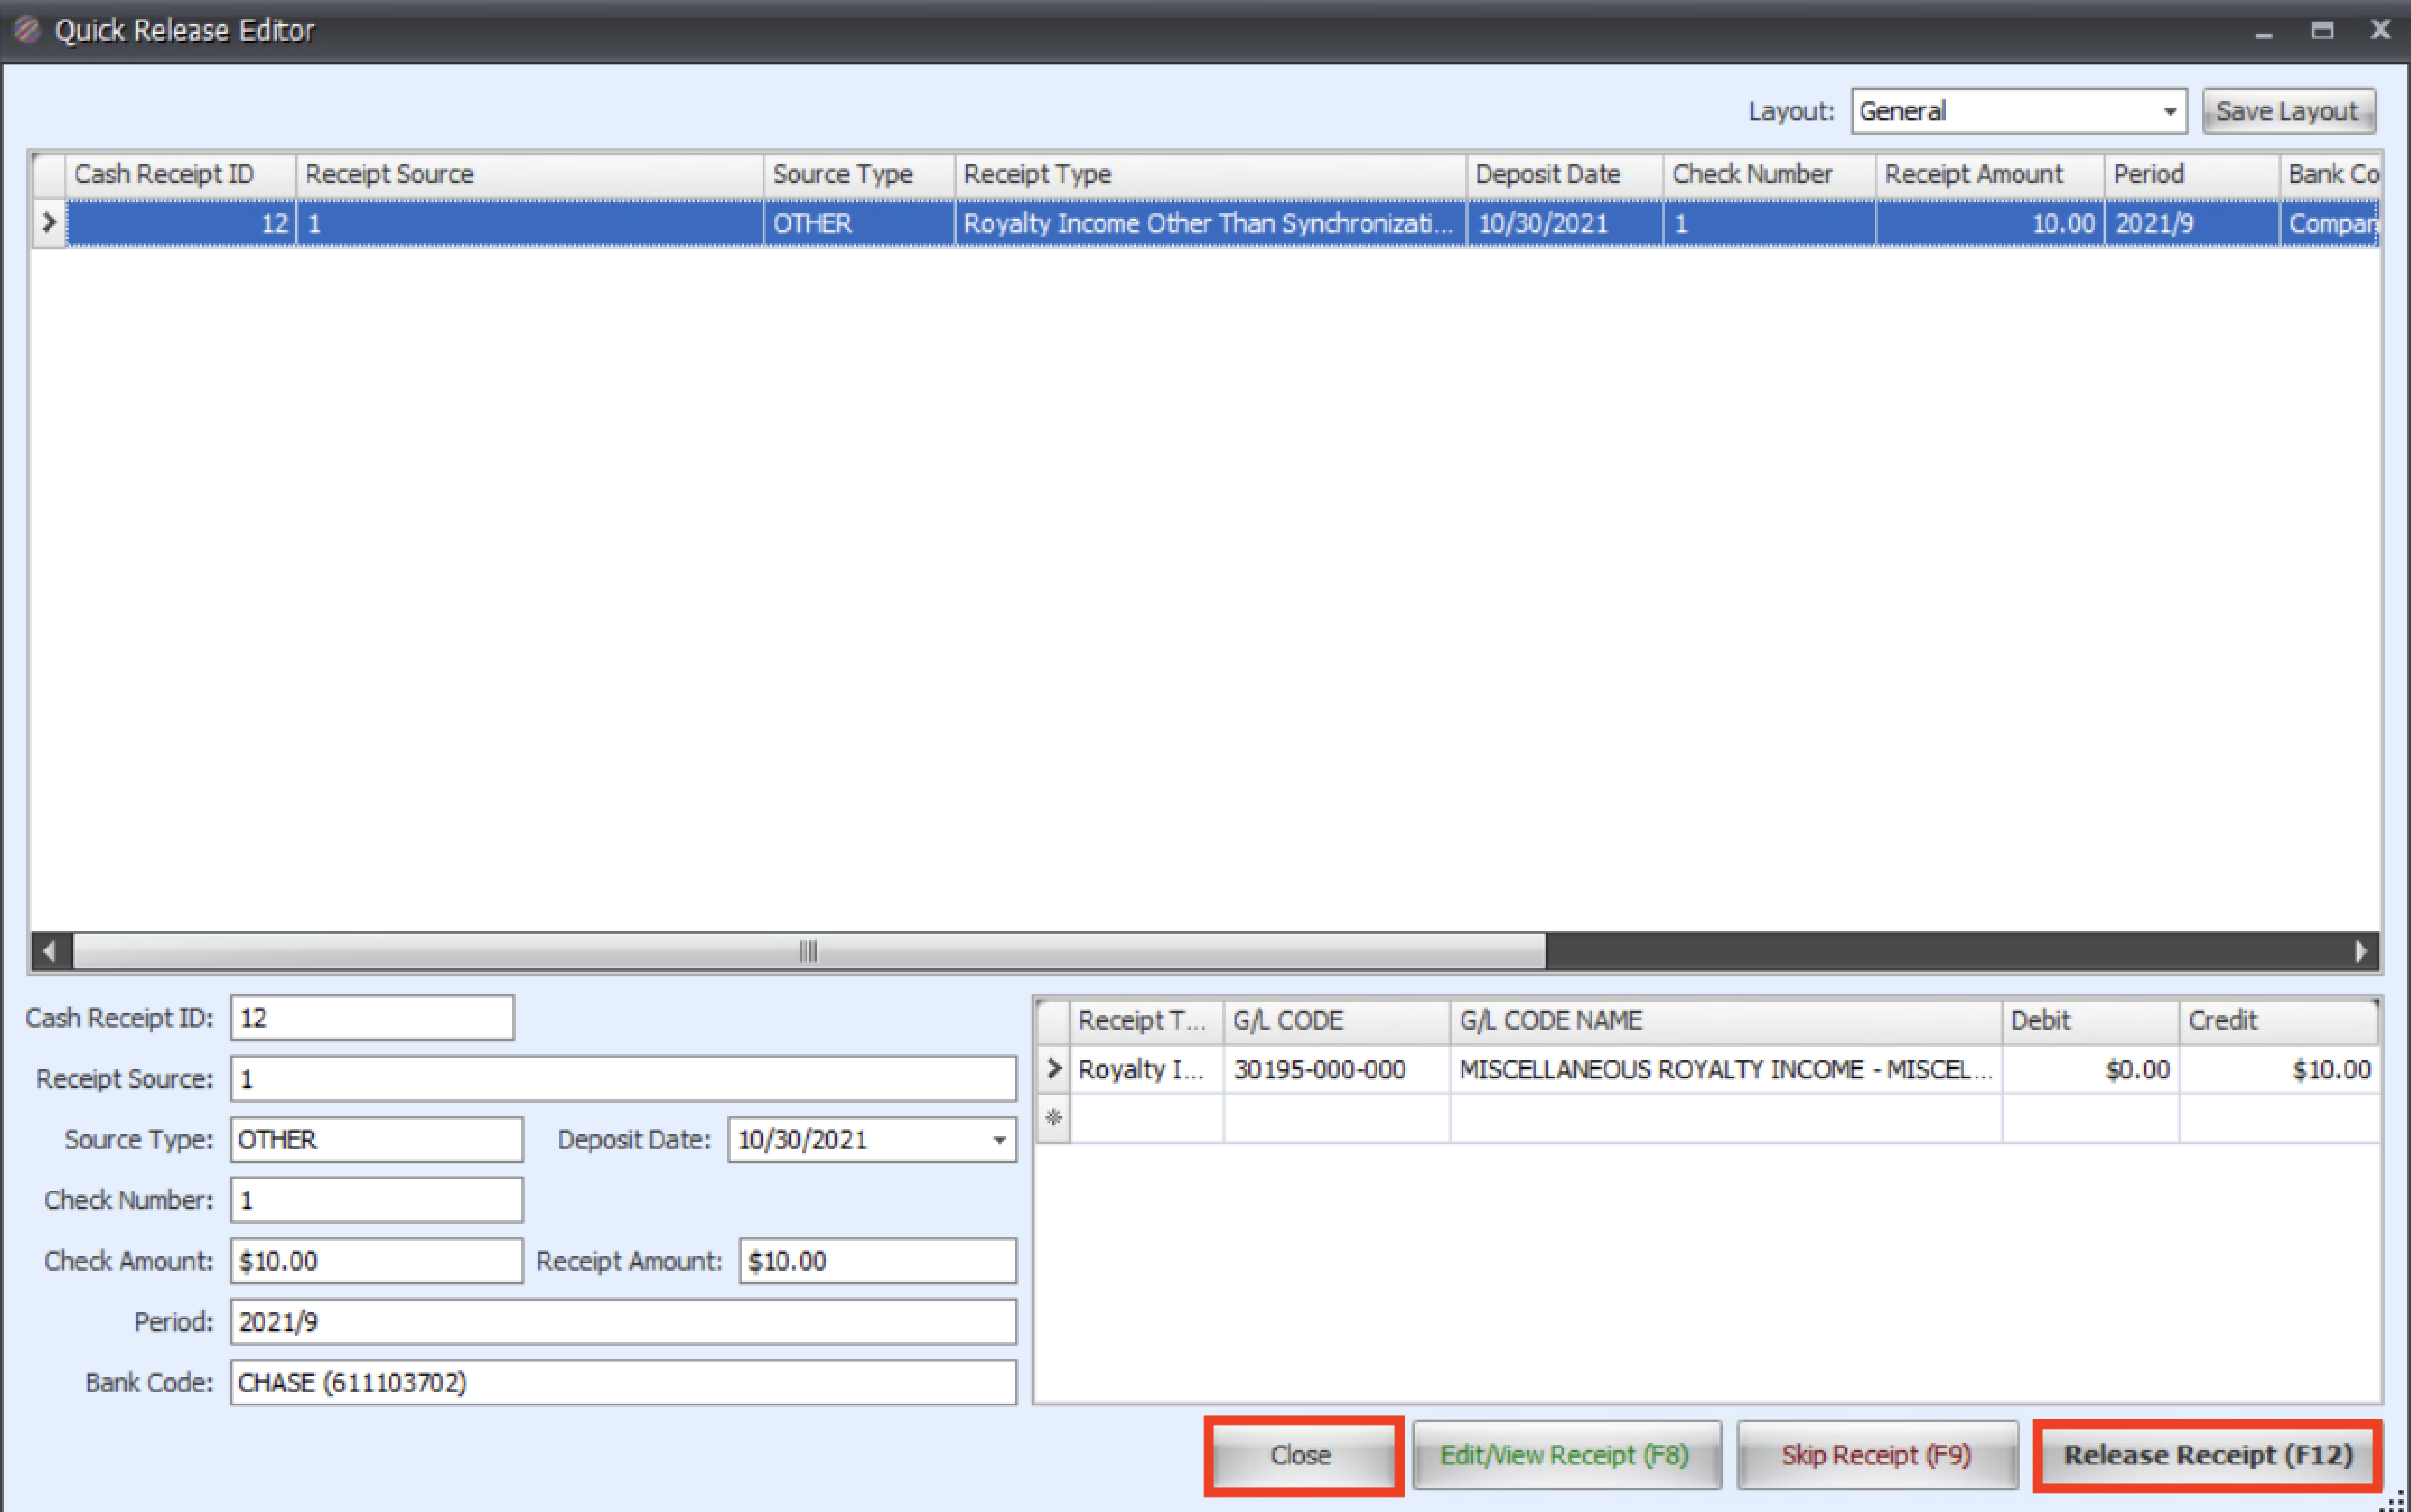
- Select your receipt and click Release Receipt at the bottom, then click Close.
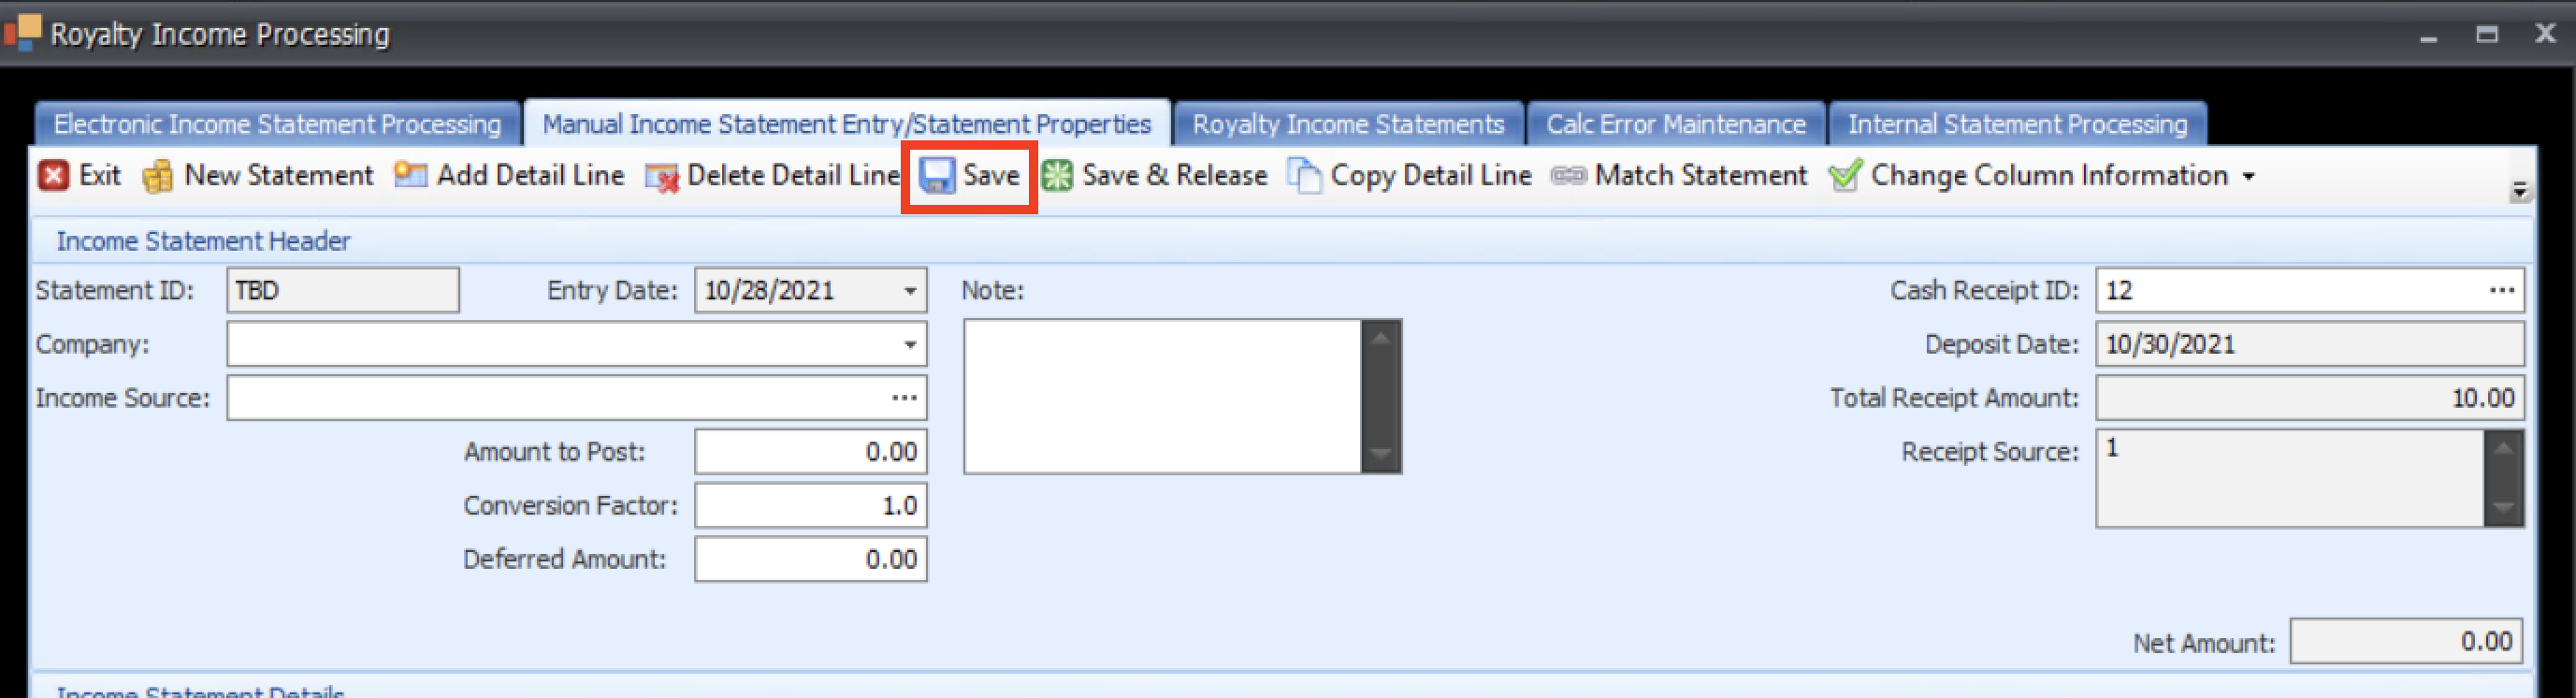
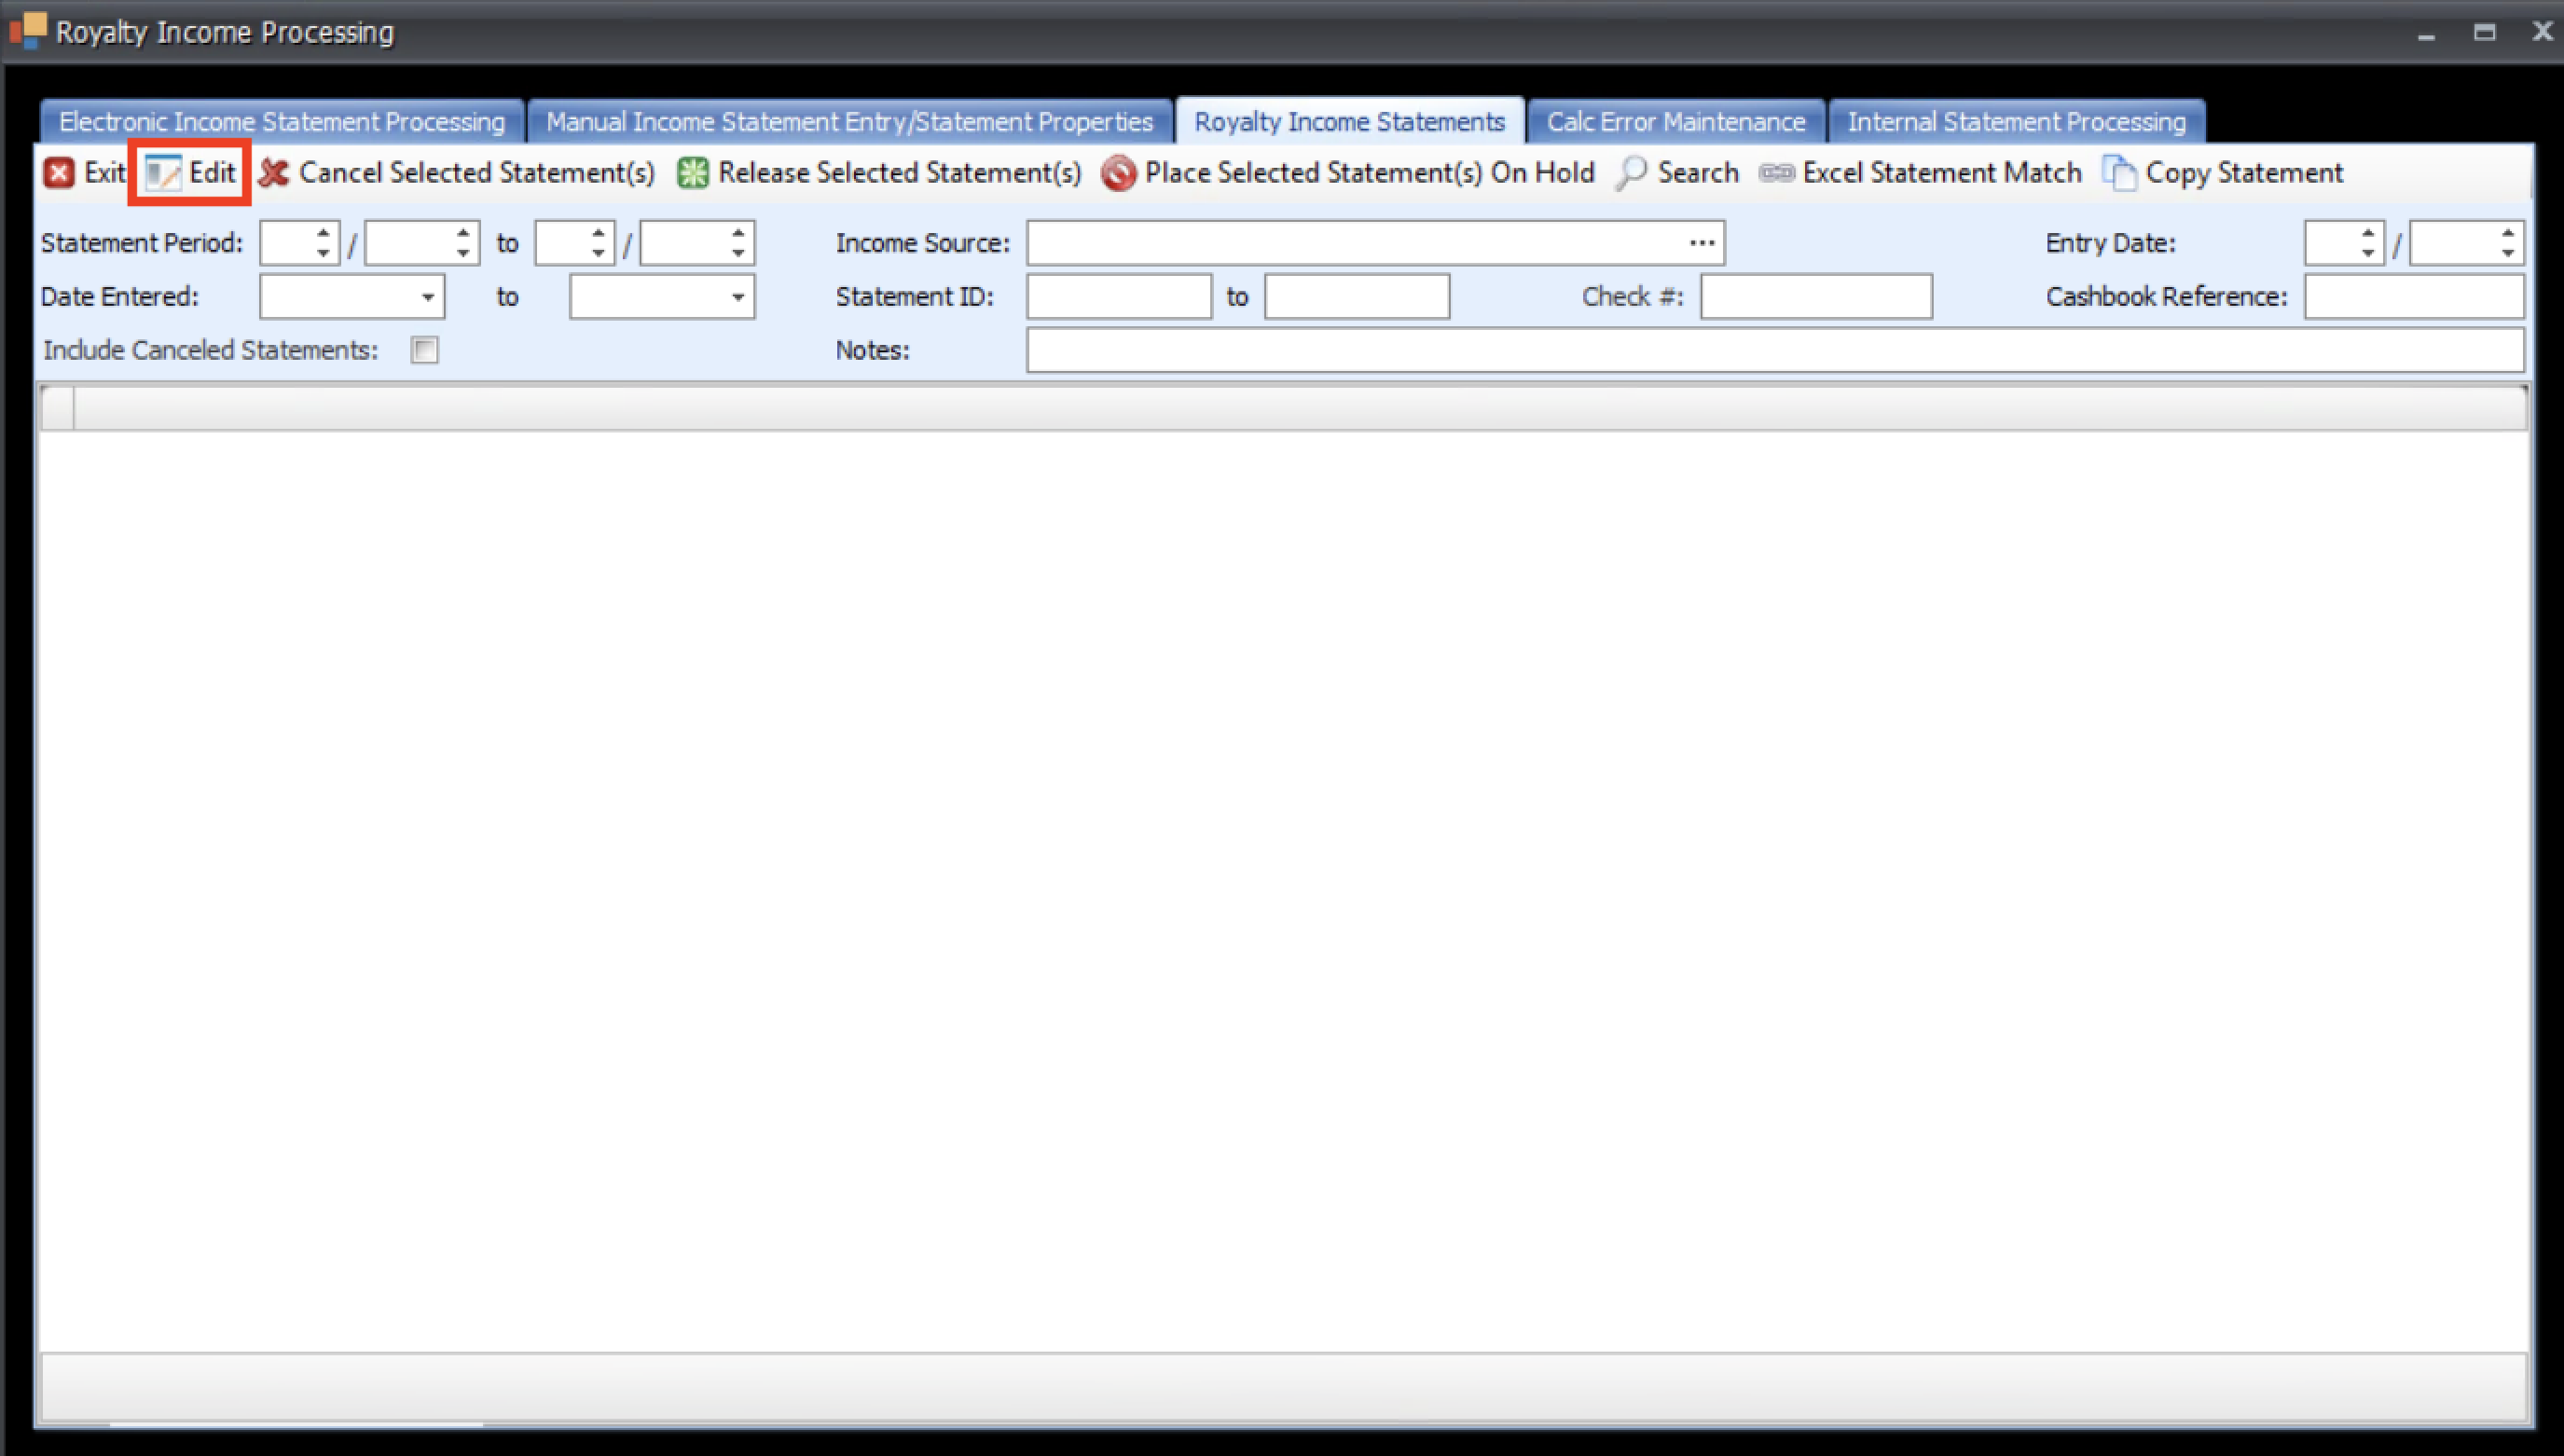
- In the IRIS.NET Royalty System tab of the IRIS ribbon select Royalty Income Mgmt.

- Go to the Royalty Income Statements tab and search for the statement you want to add the cash receipt to, select the statement and click Edit.
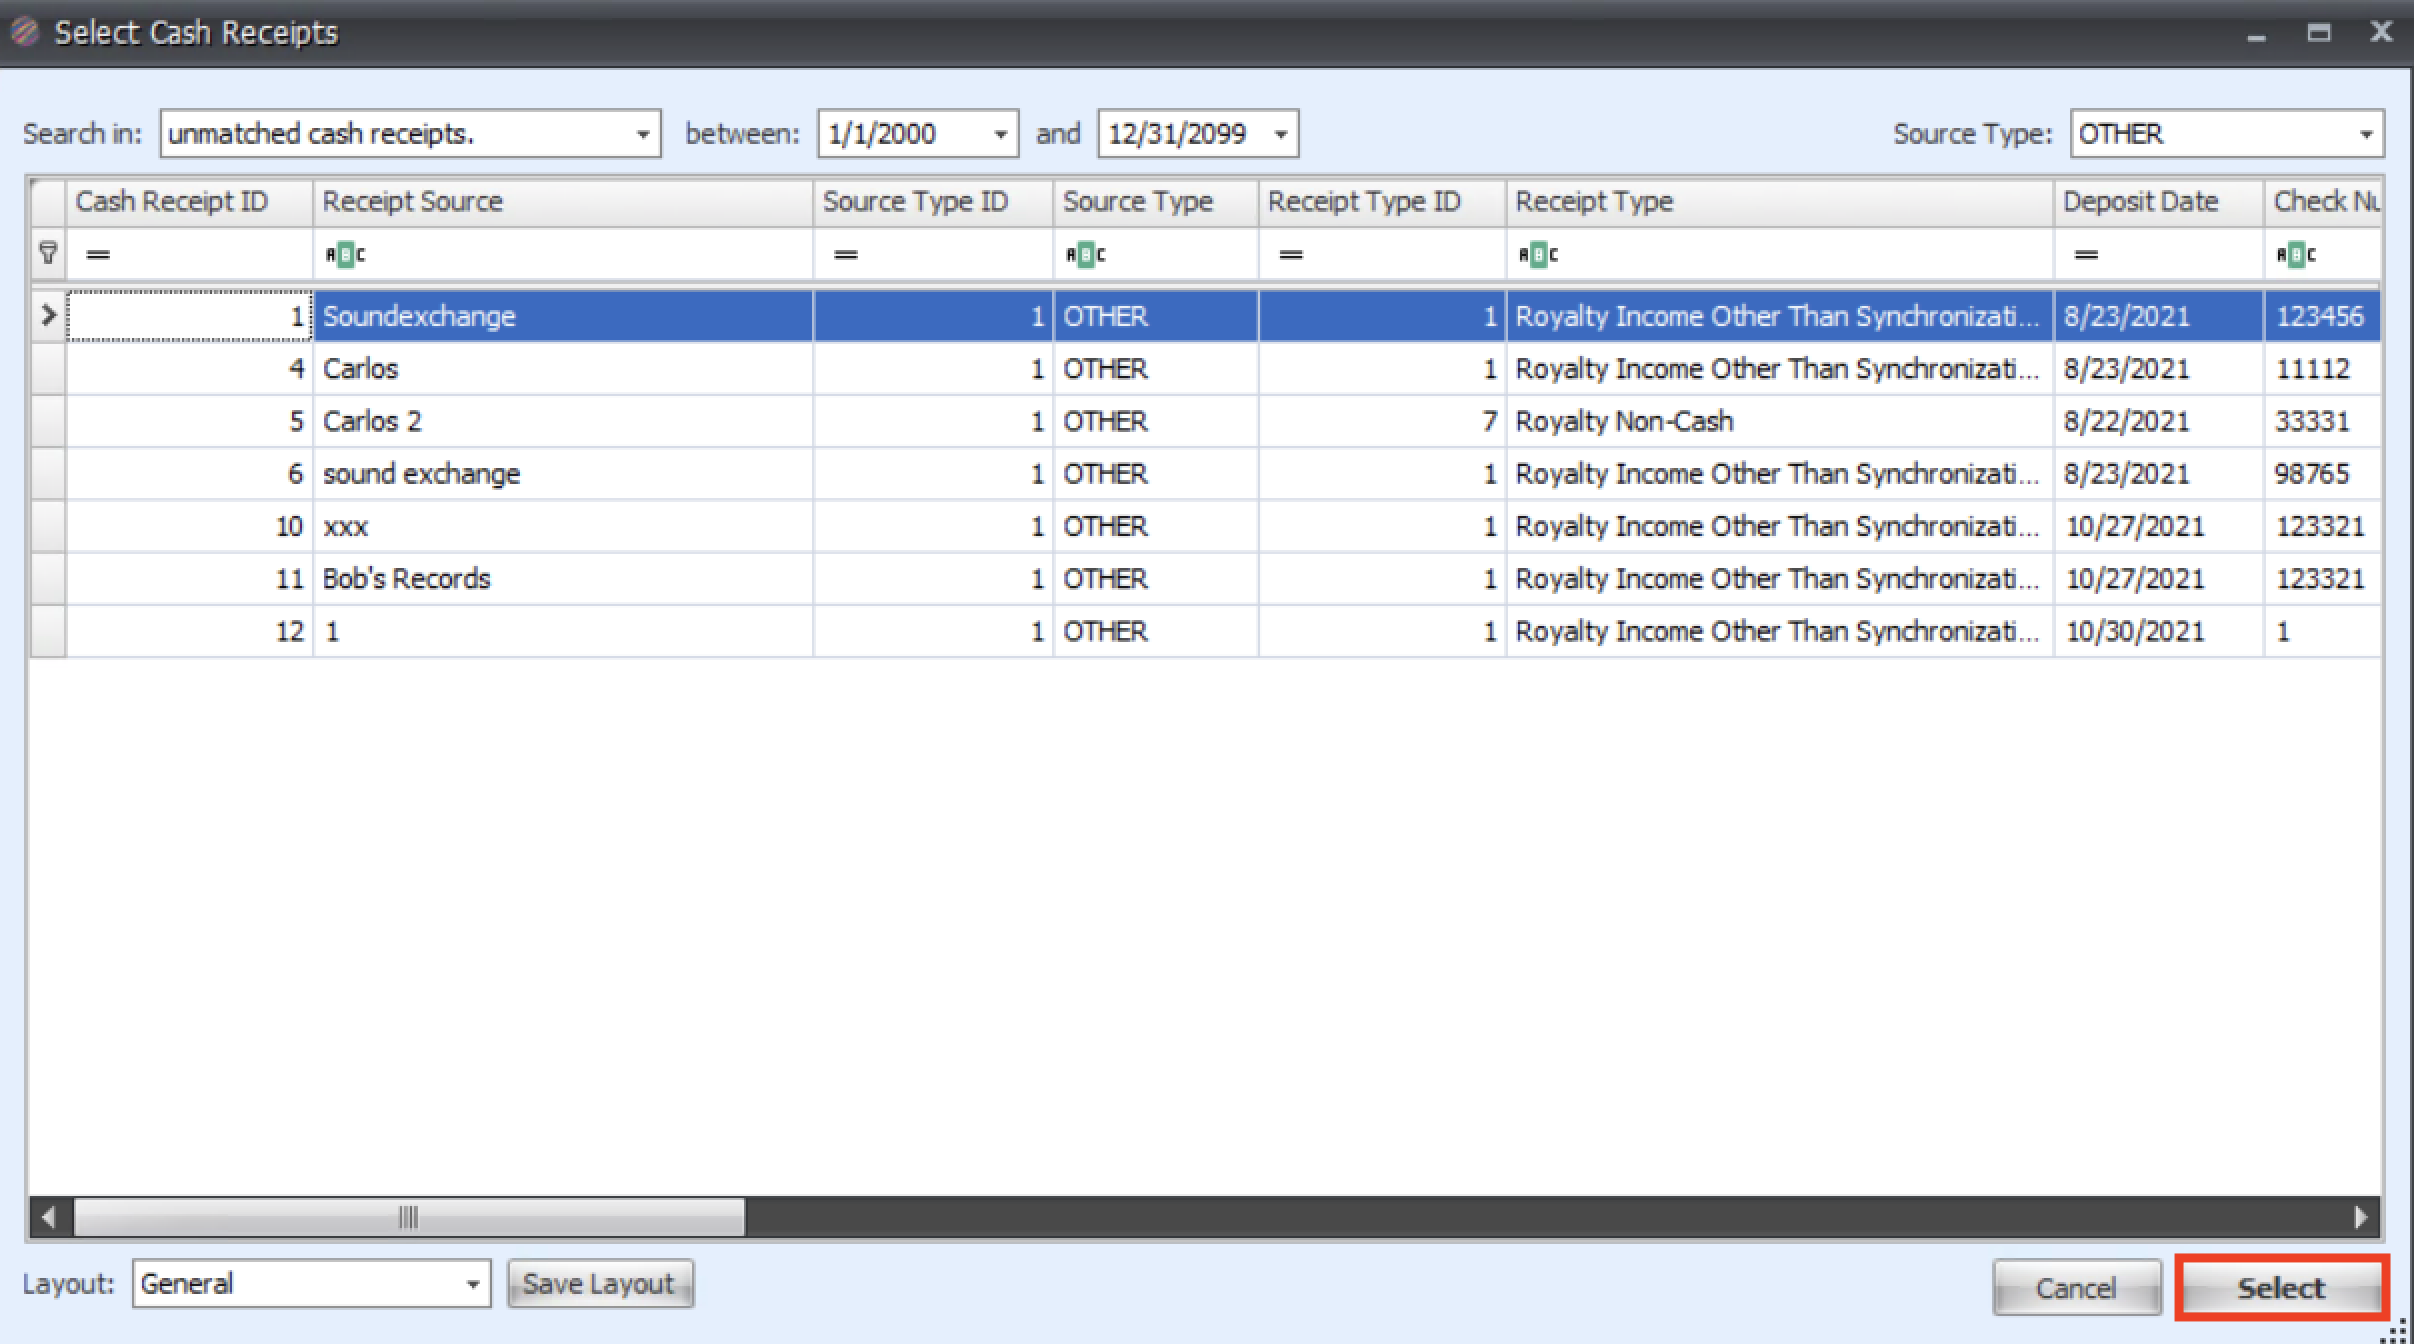
- Click the ... next to Cash Receipt ID.
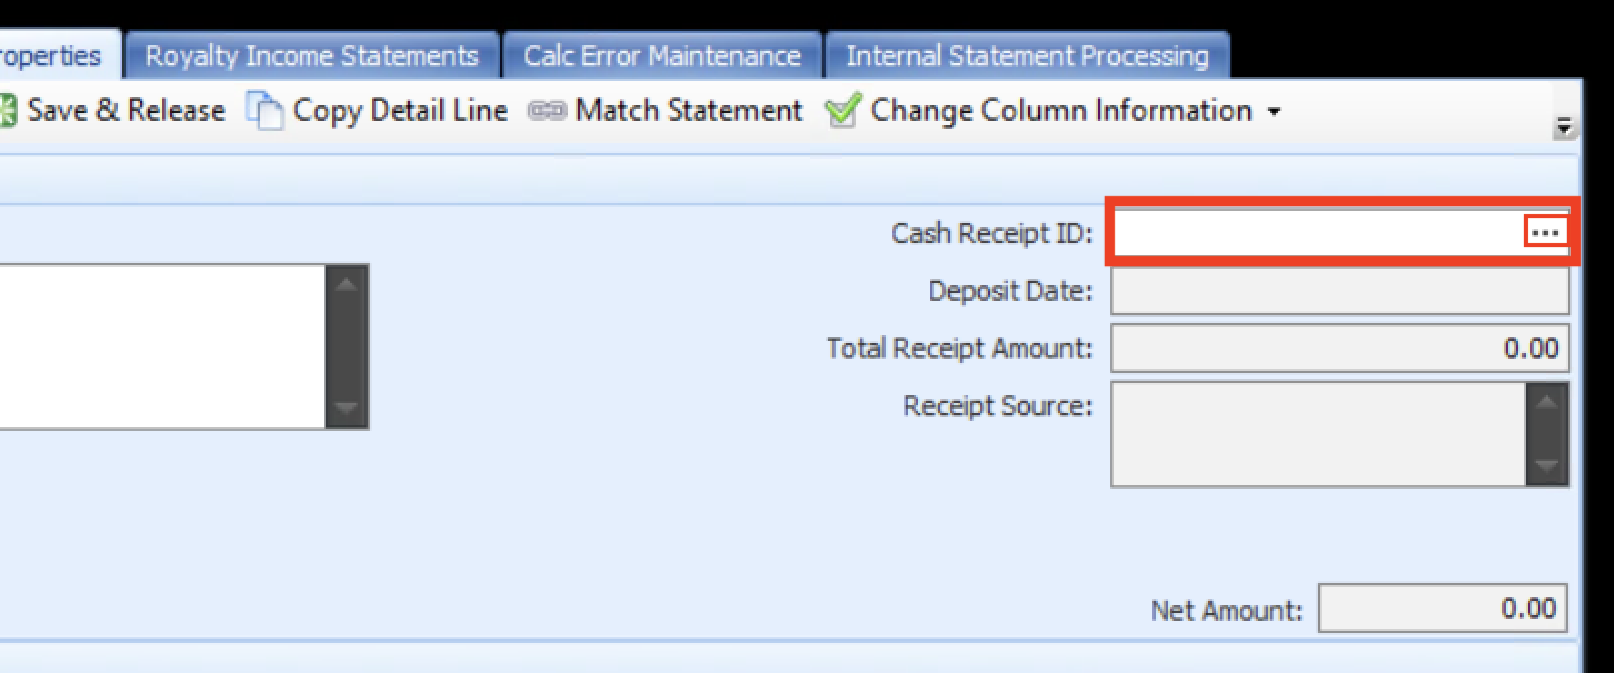
- Select your cash receipt and click Select at the bottom.
- The Cash Receipt is now attached, Click Save to save your changes to the statement.